
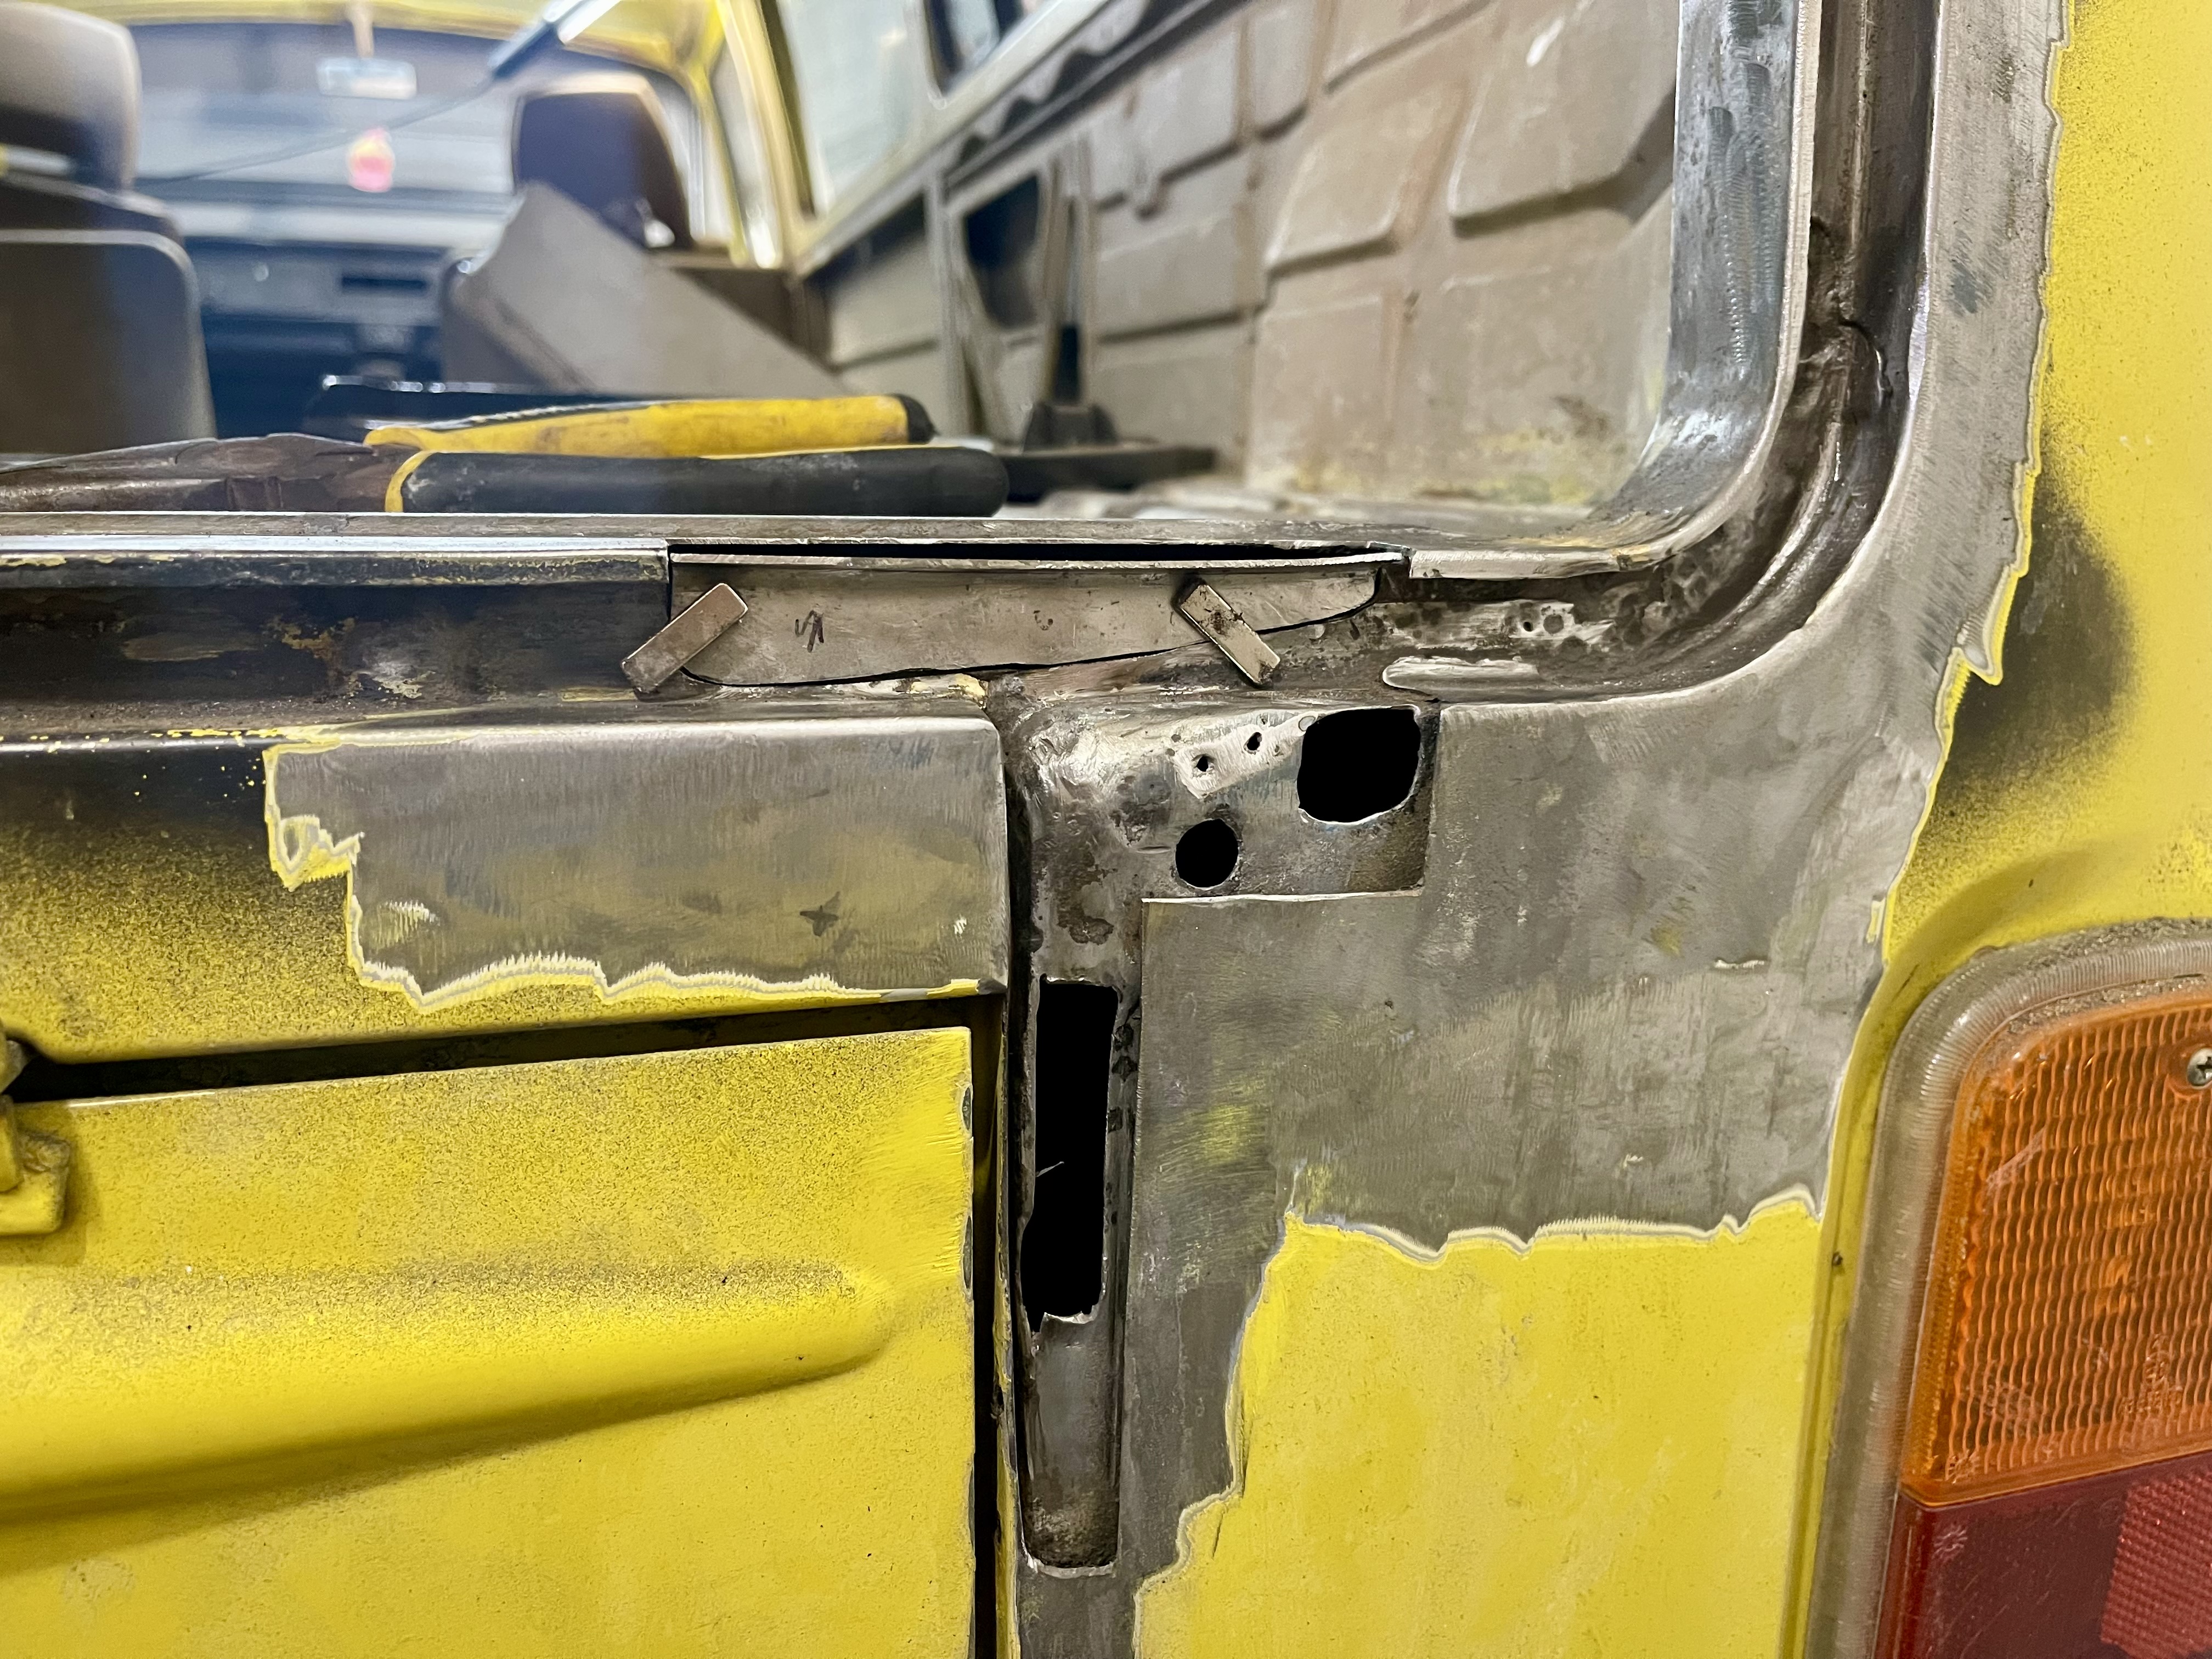
The back door surround and D-pillar on Daisy have been hiding some nasty surprises. From the outside it didn't look too bad, just some pin-holes. But as soon as I started grinding back the bog (body filler), the real story came out.
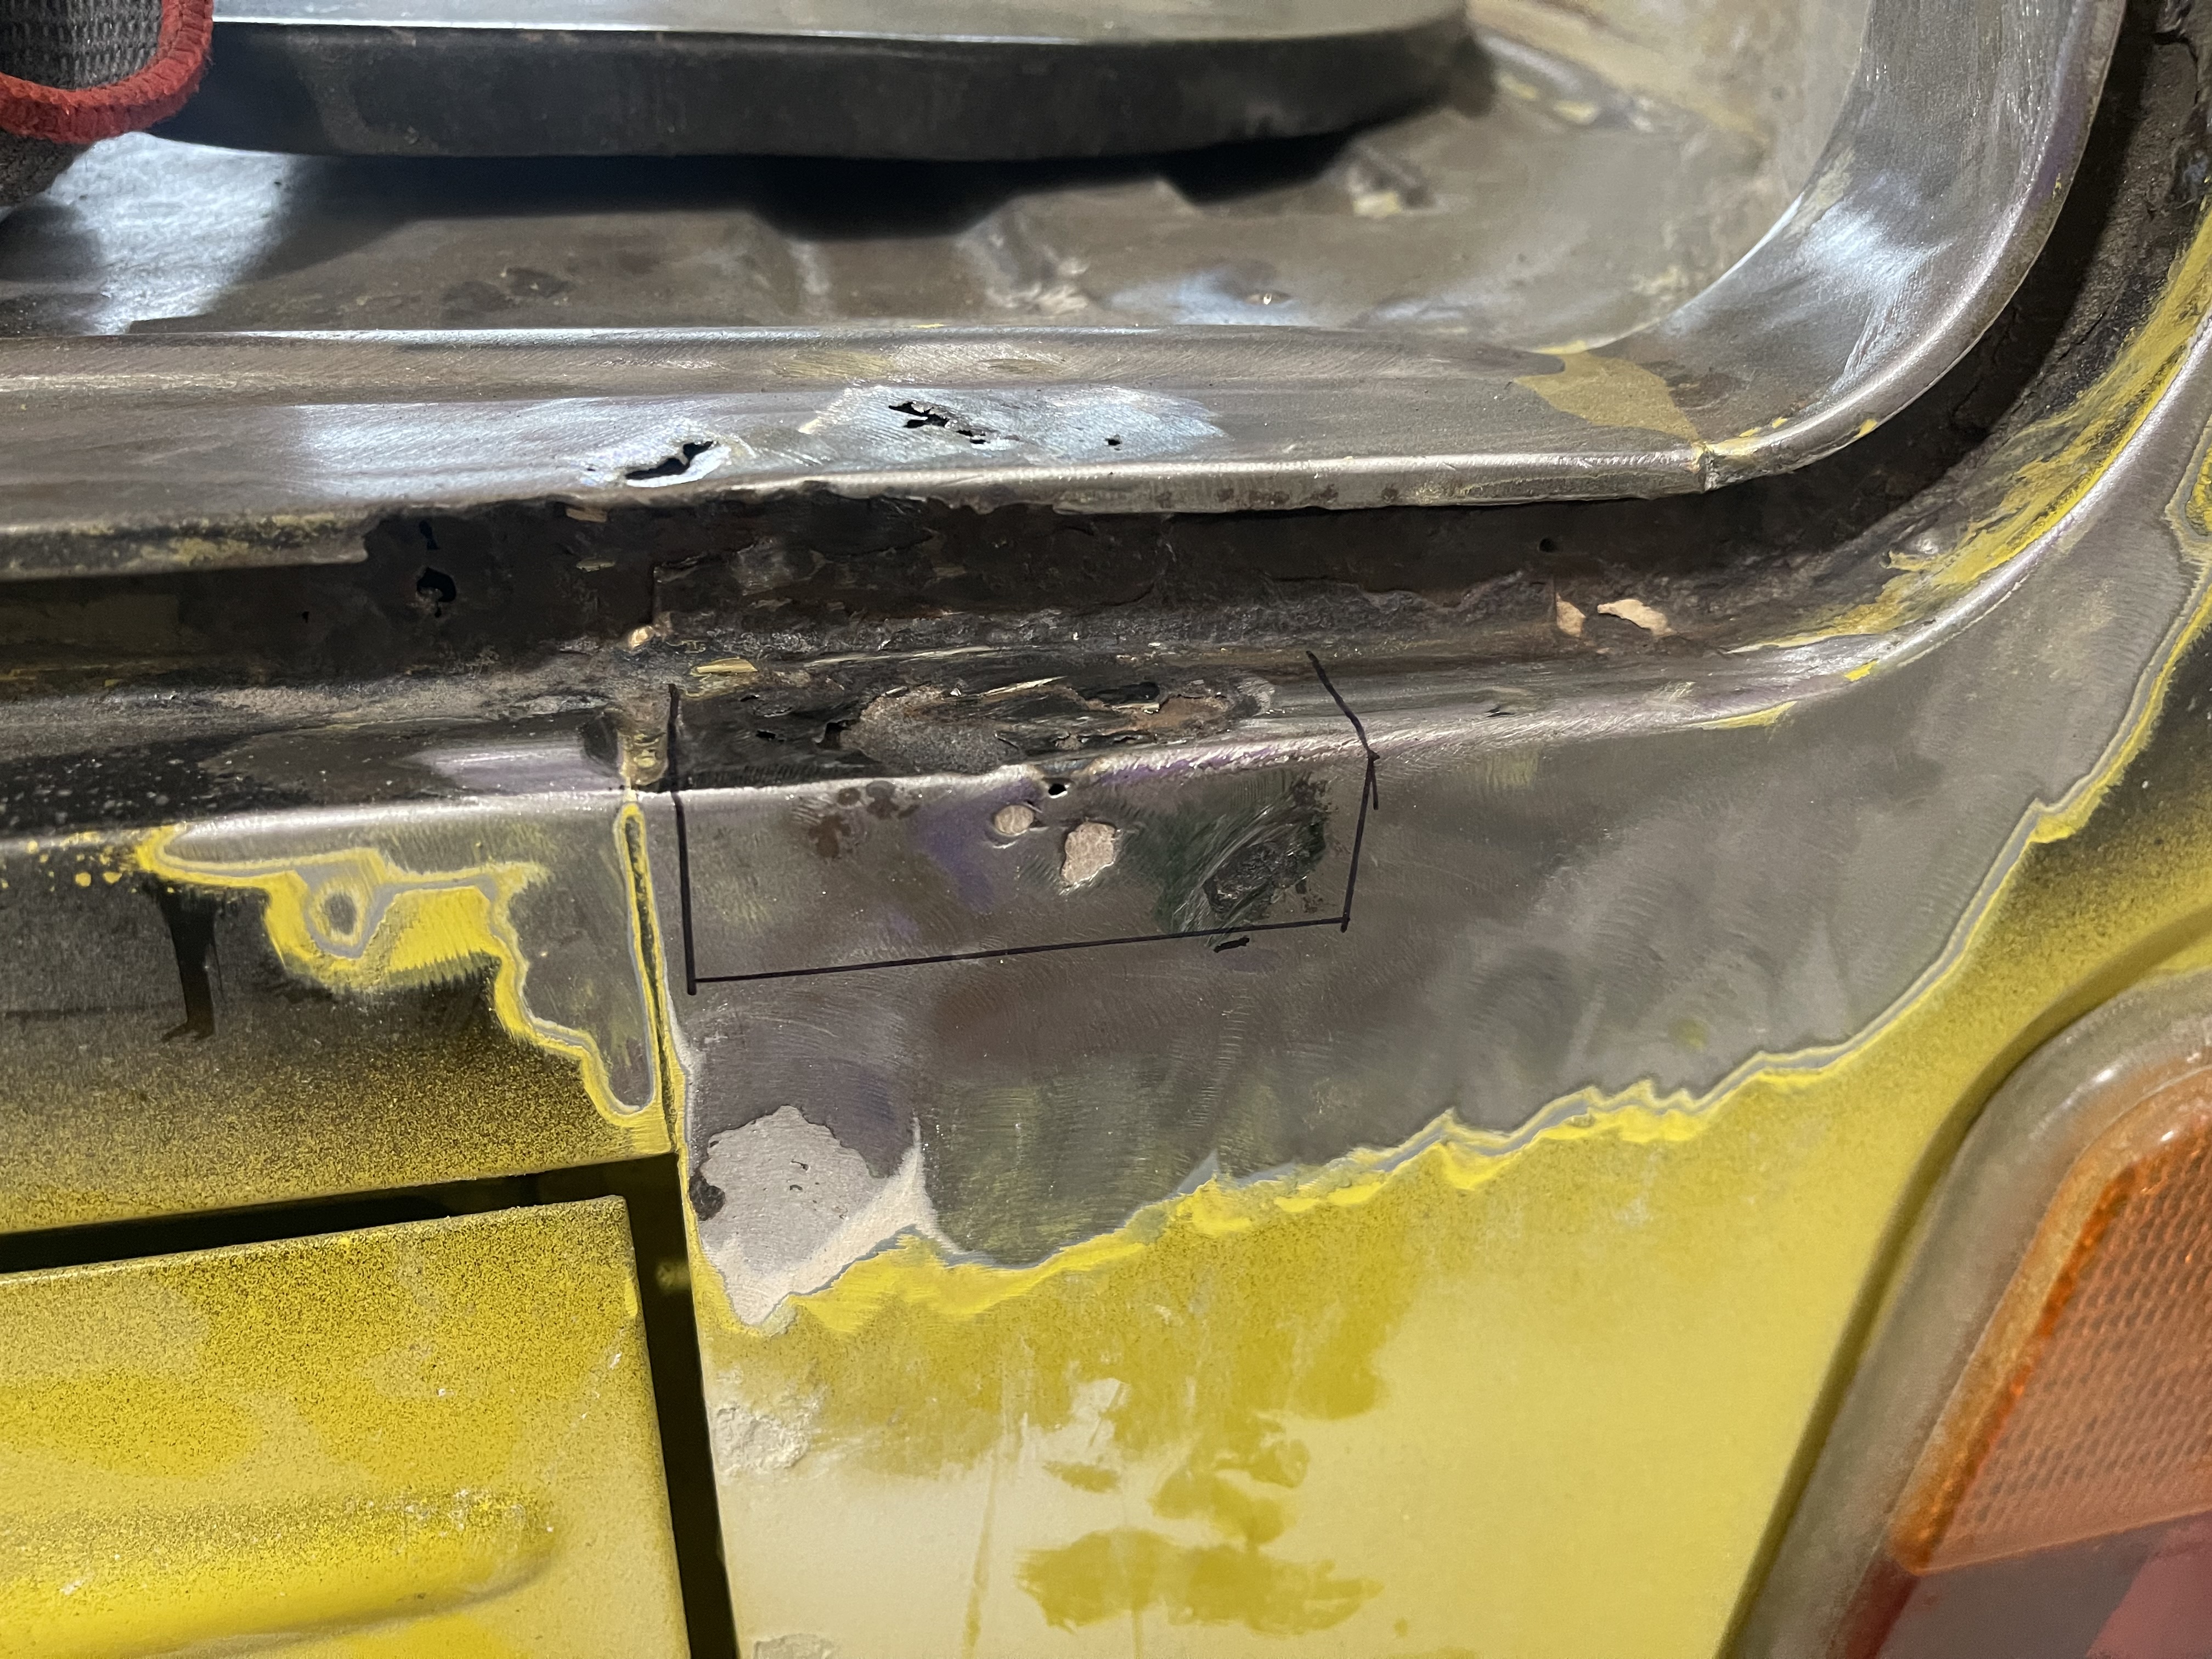 Underneath the bog, lays some small rust holes
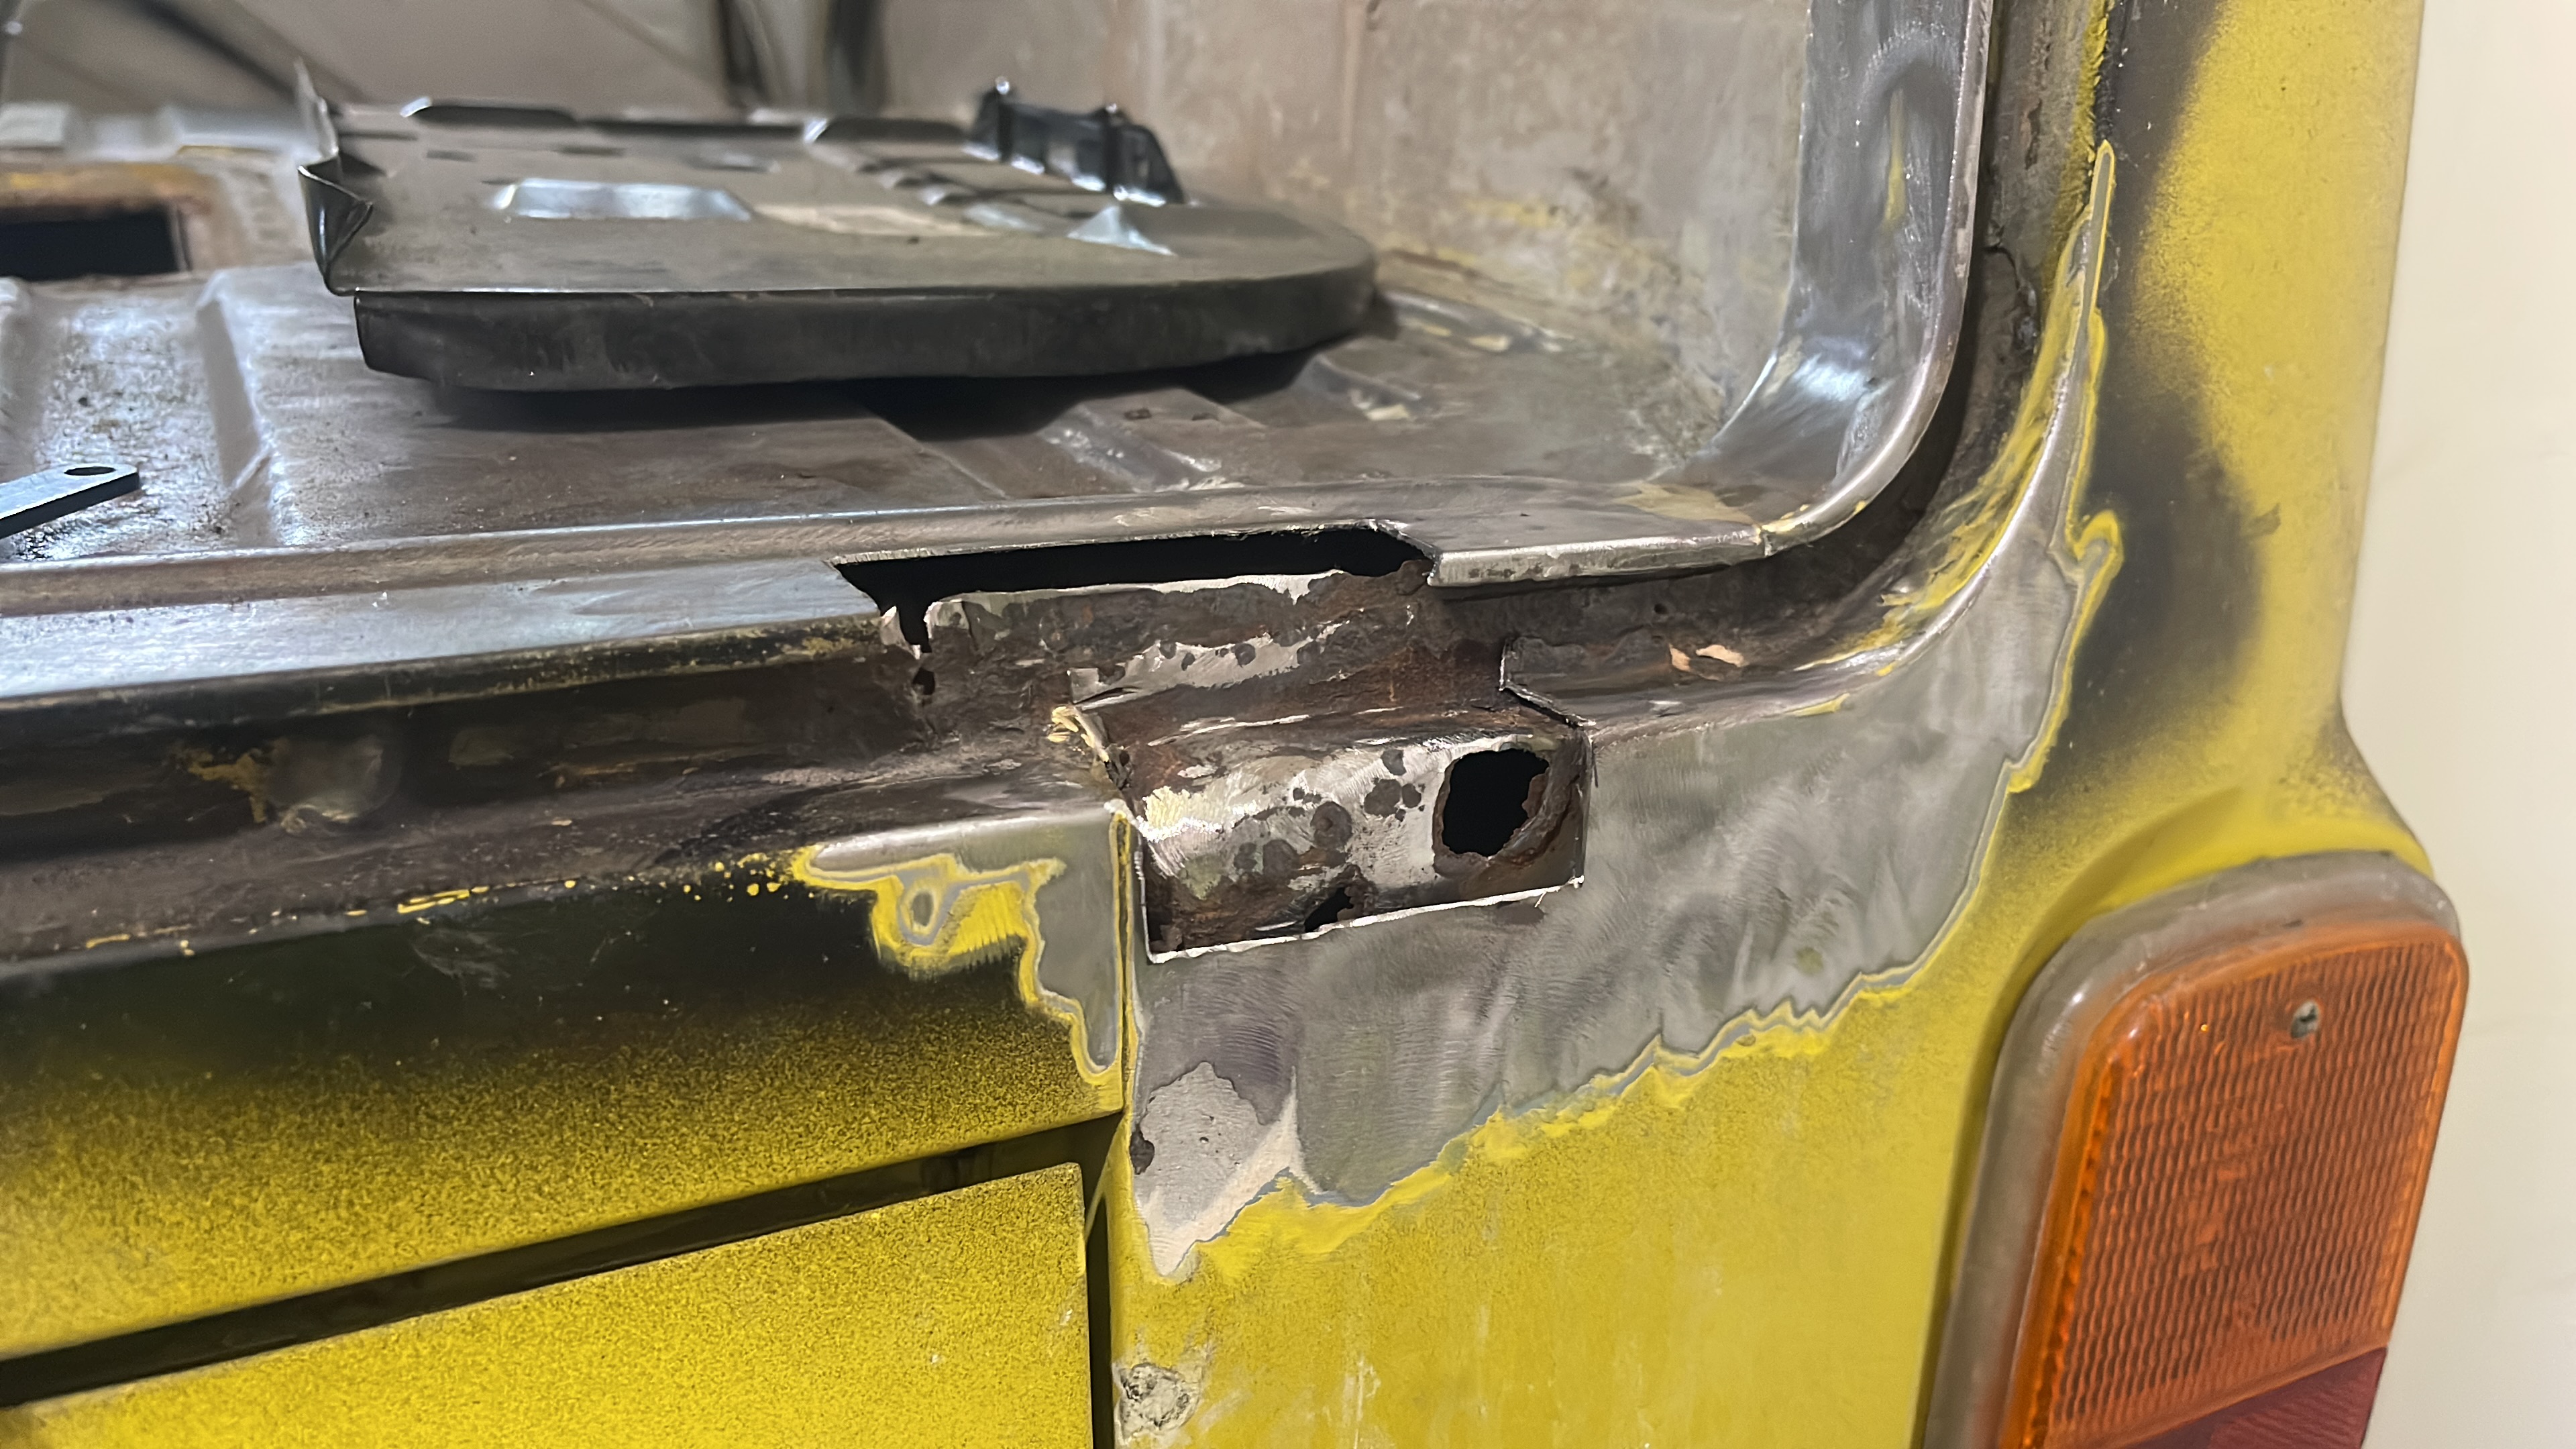 We find even more holes in the D-pillar as we go deeper
Underneath the bog there were small rust holes, and the deeper I went, the more I found. The D-pillar was peppered with them. Someone had clearly just filled over the top and called it a day. Classic. The rust had been sitting under there getting worse for years, hidden behind a layer of filler. There's a lesson here, bog is not a fix for rust.
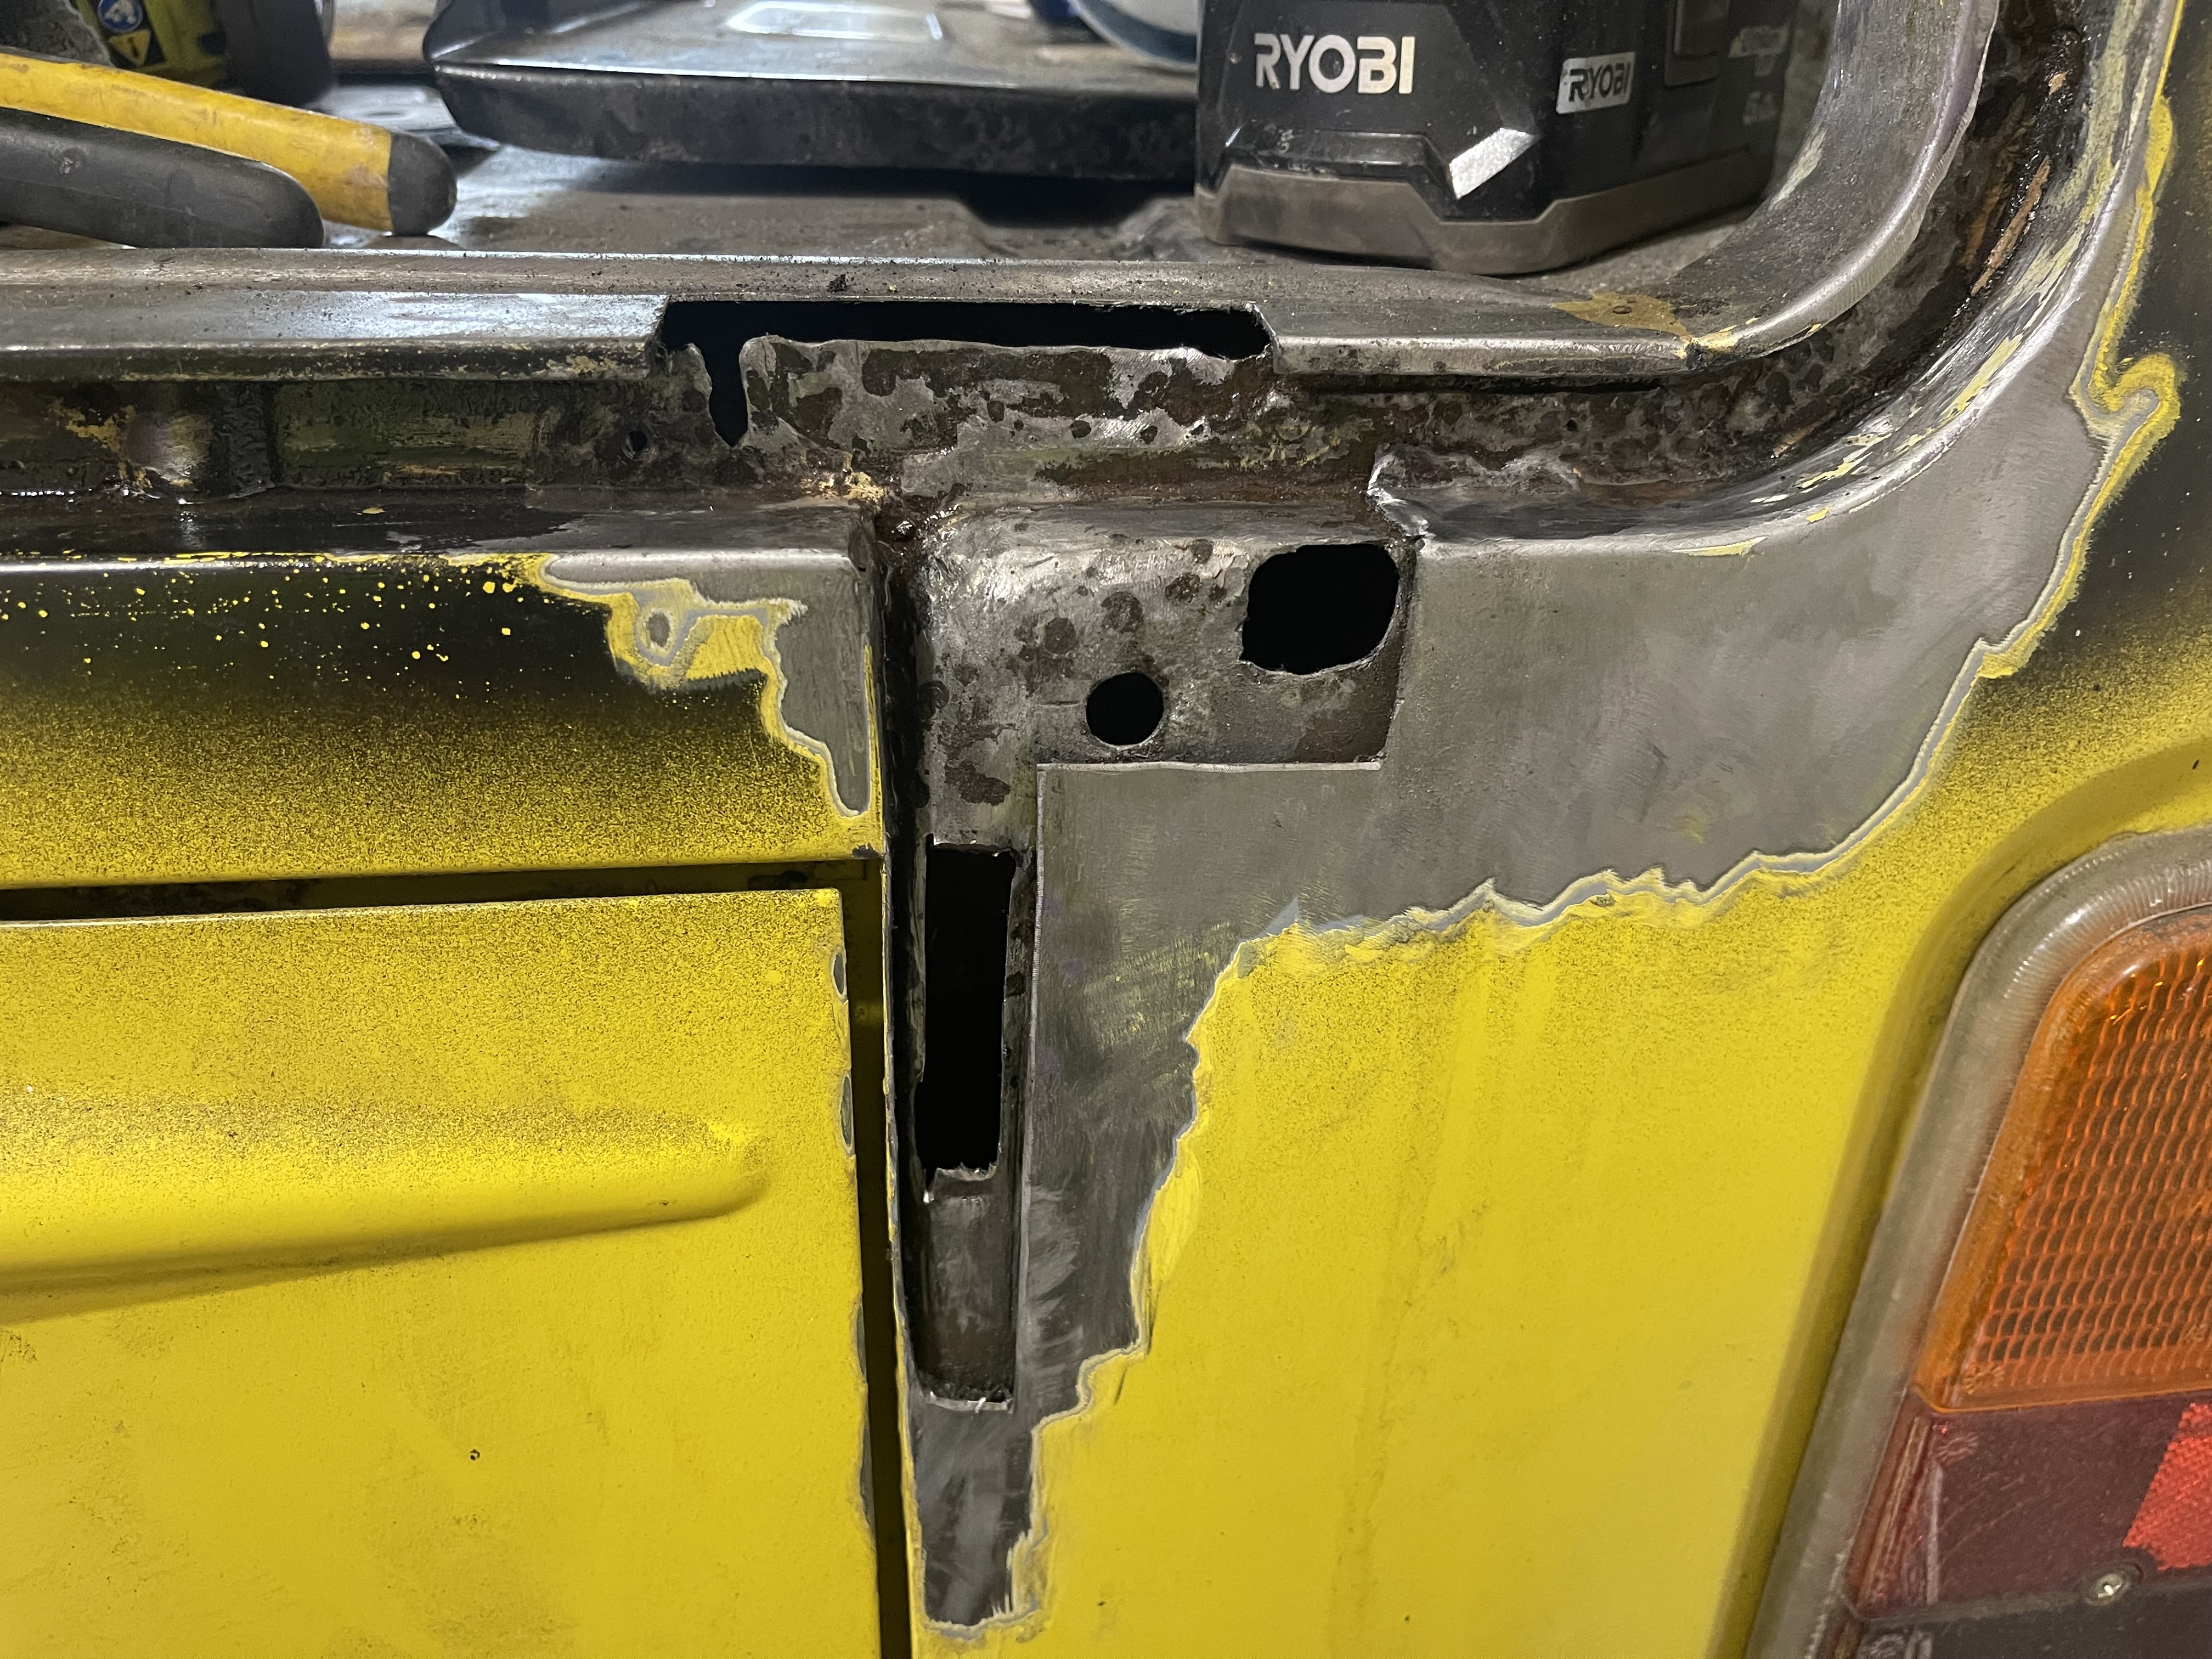 Even deeper, even more holes
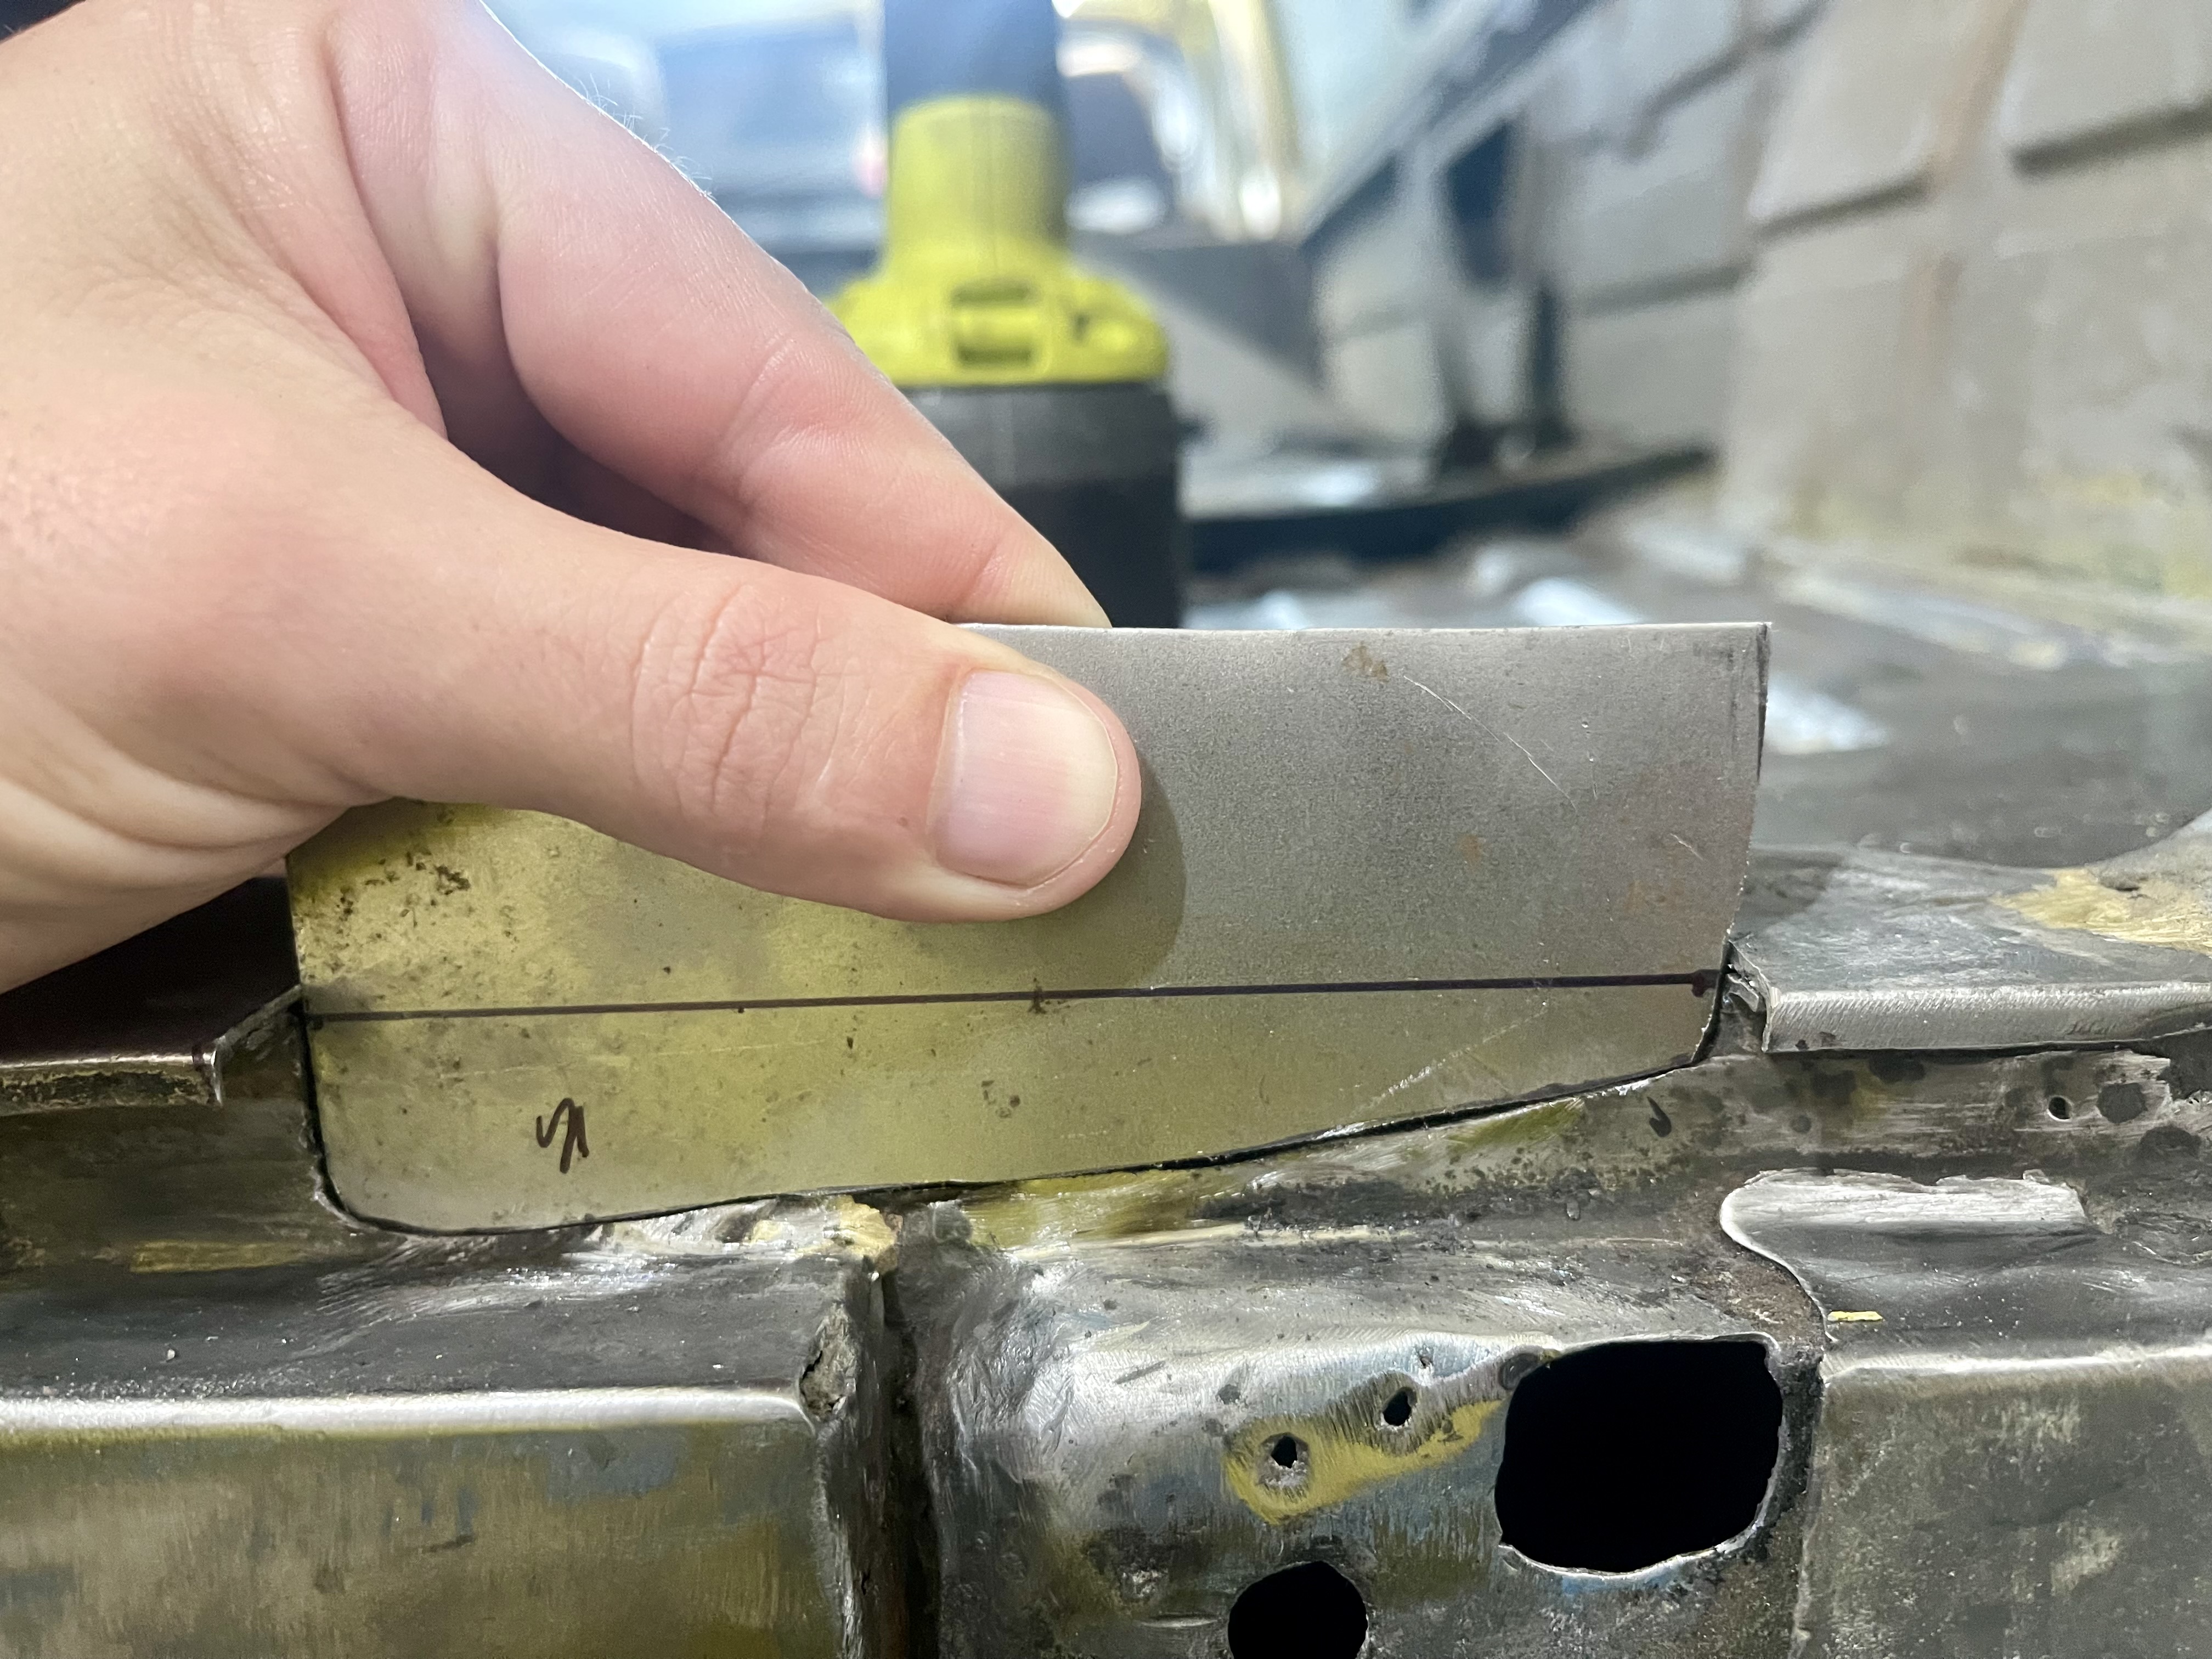
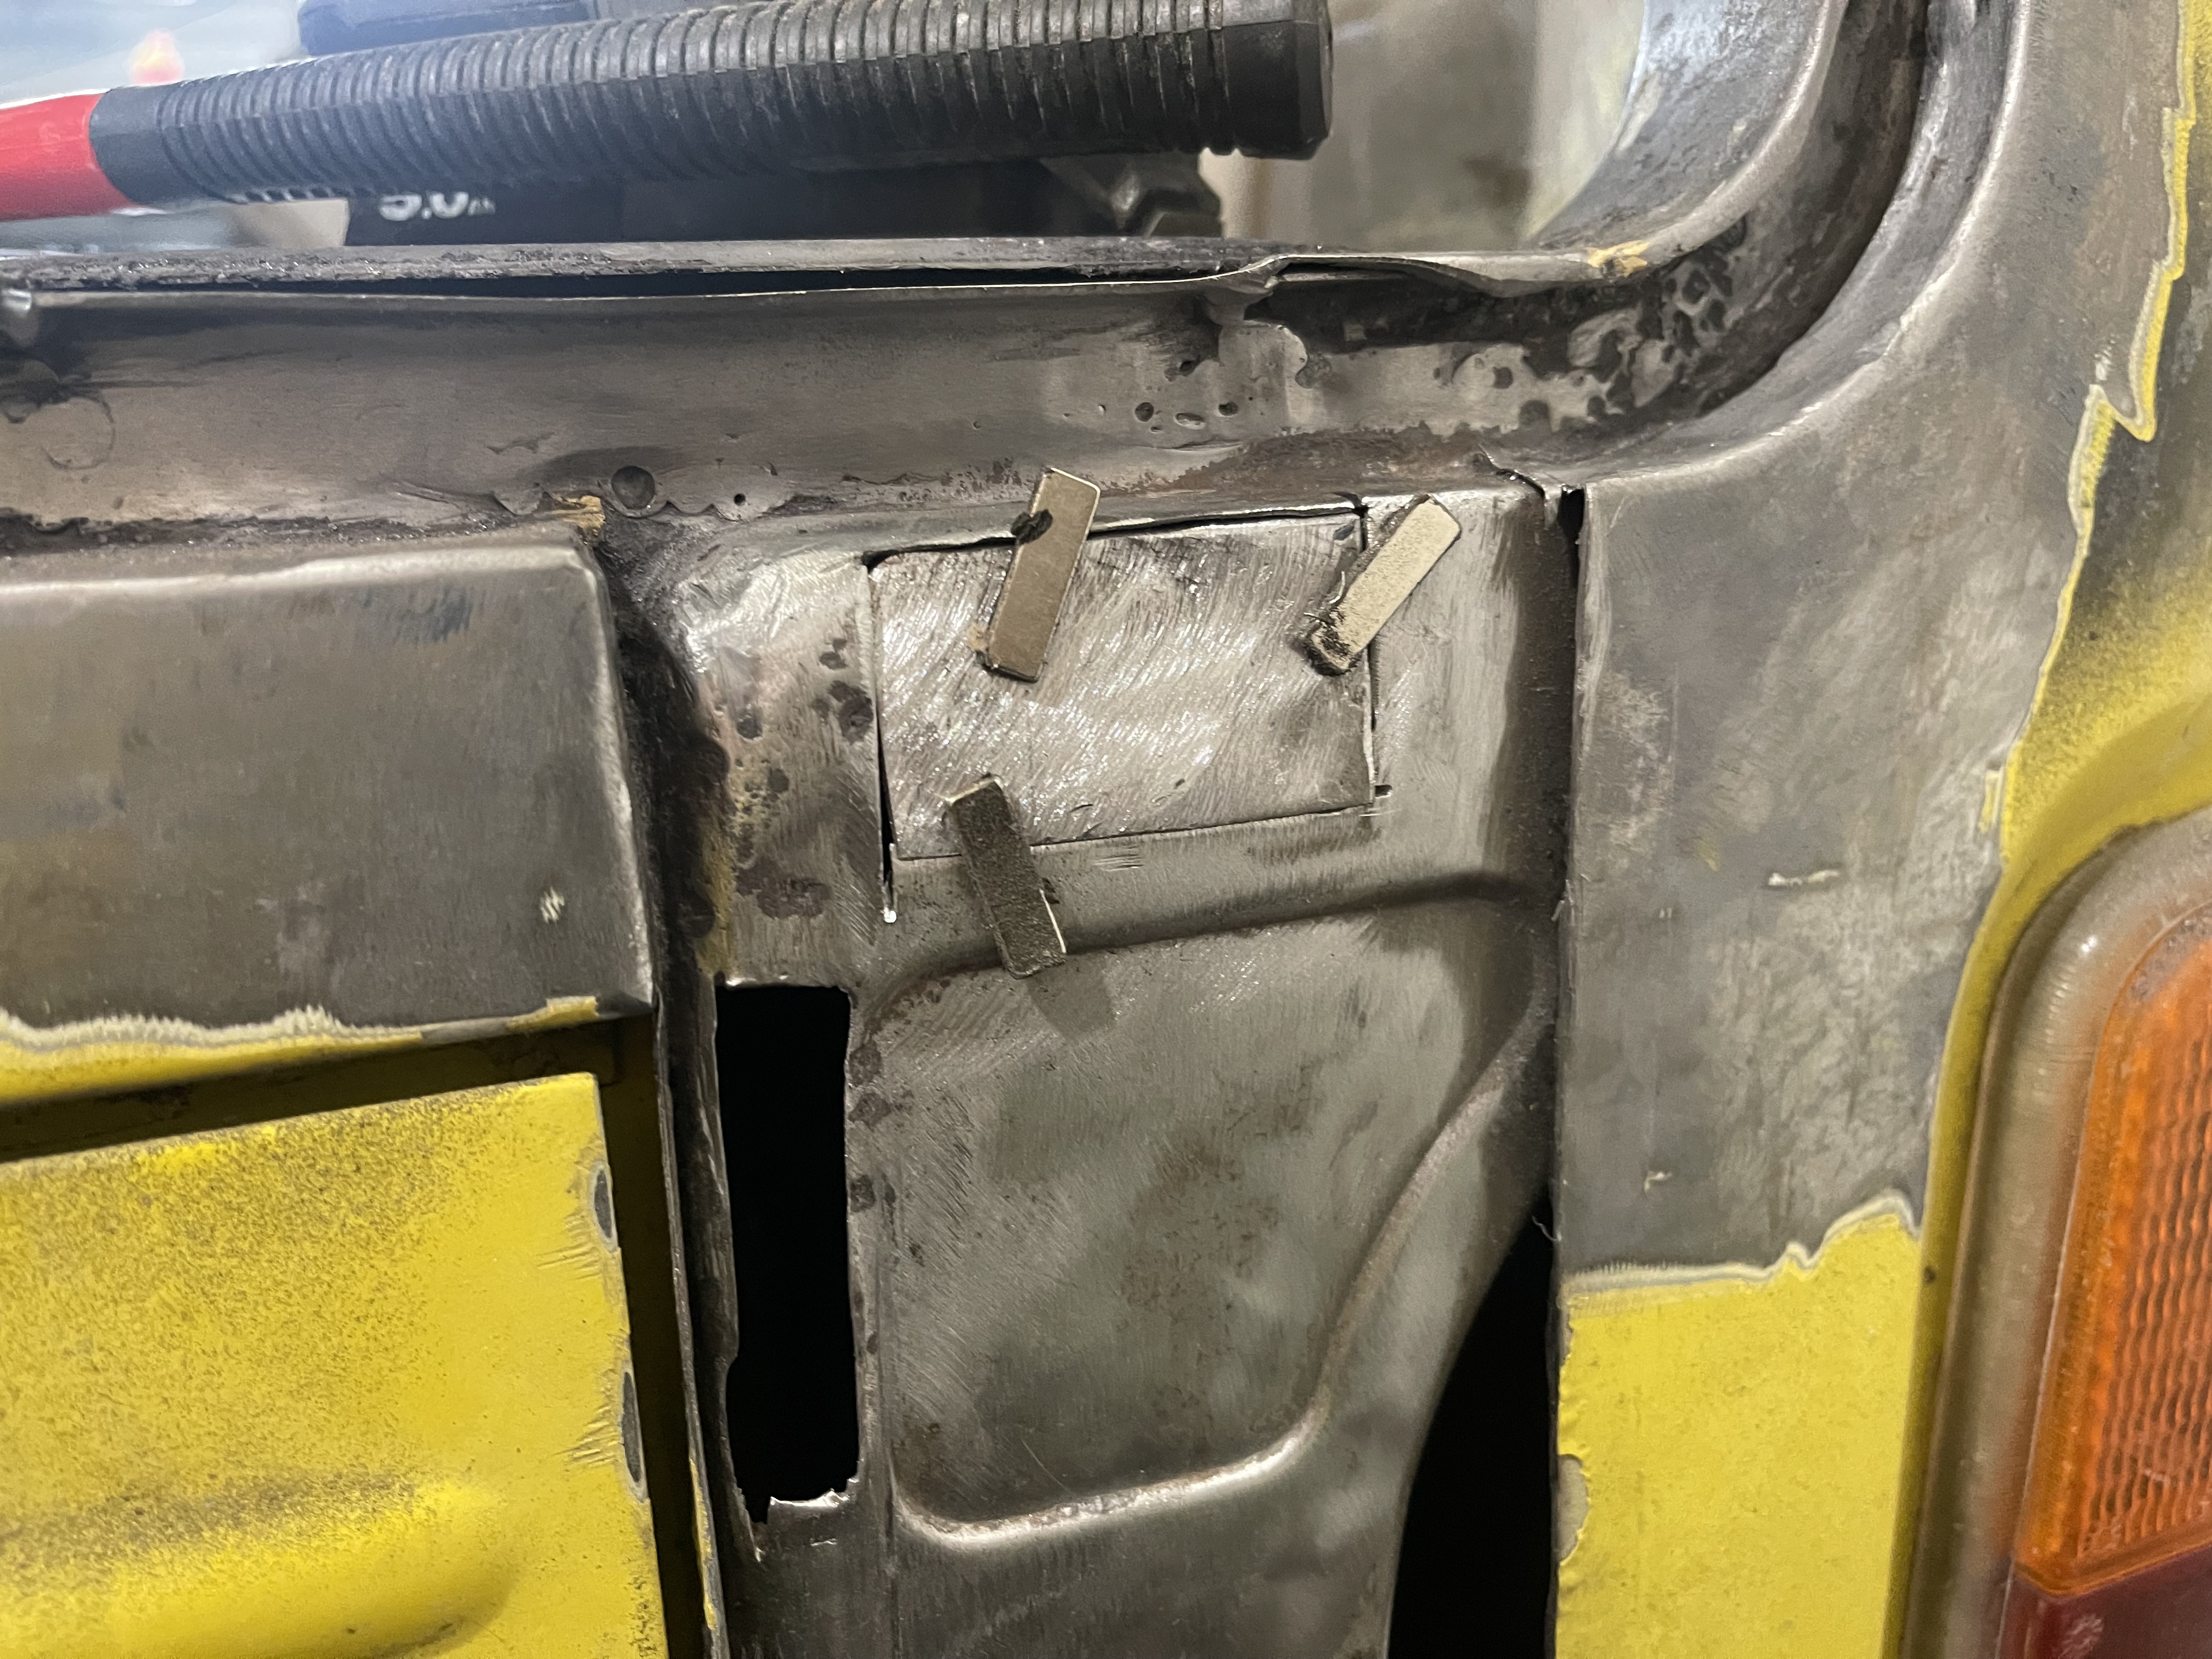
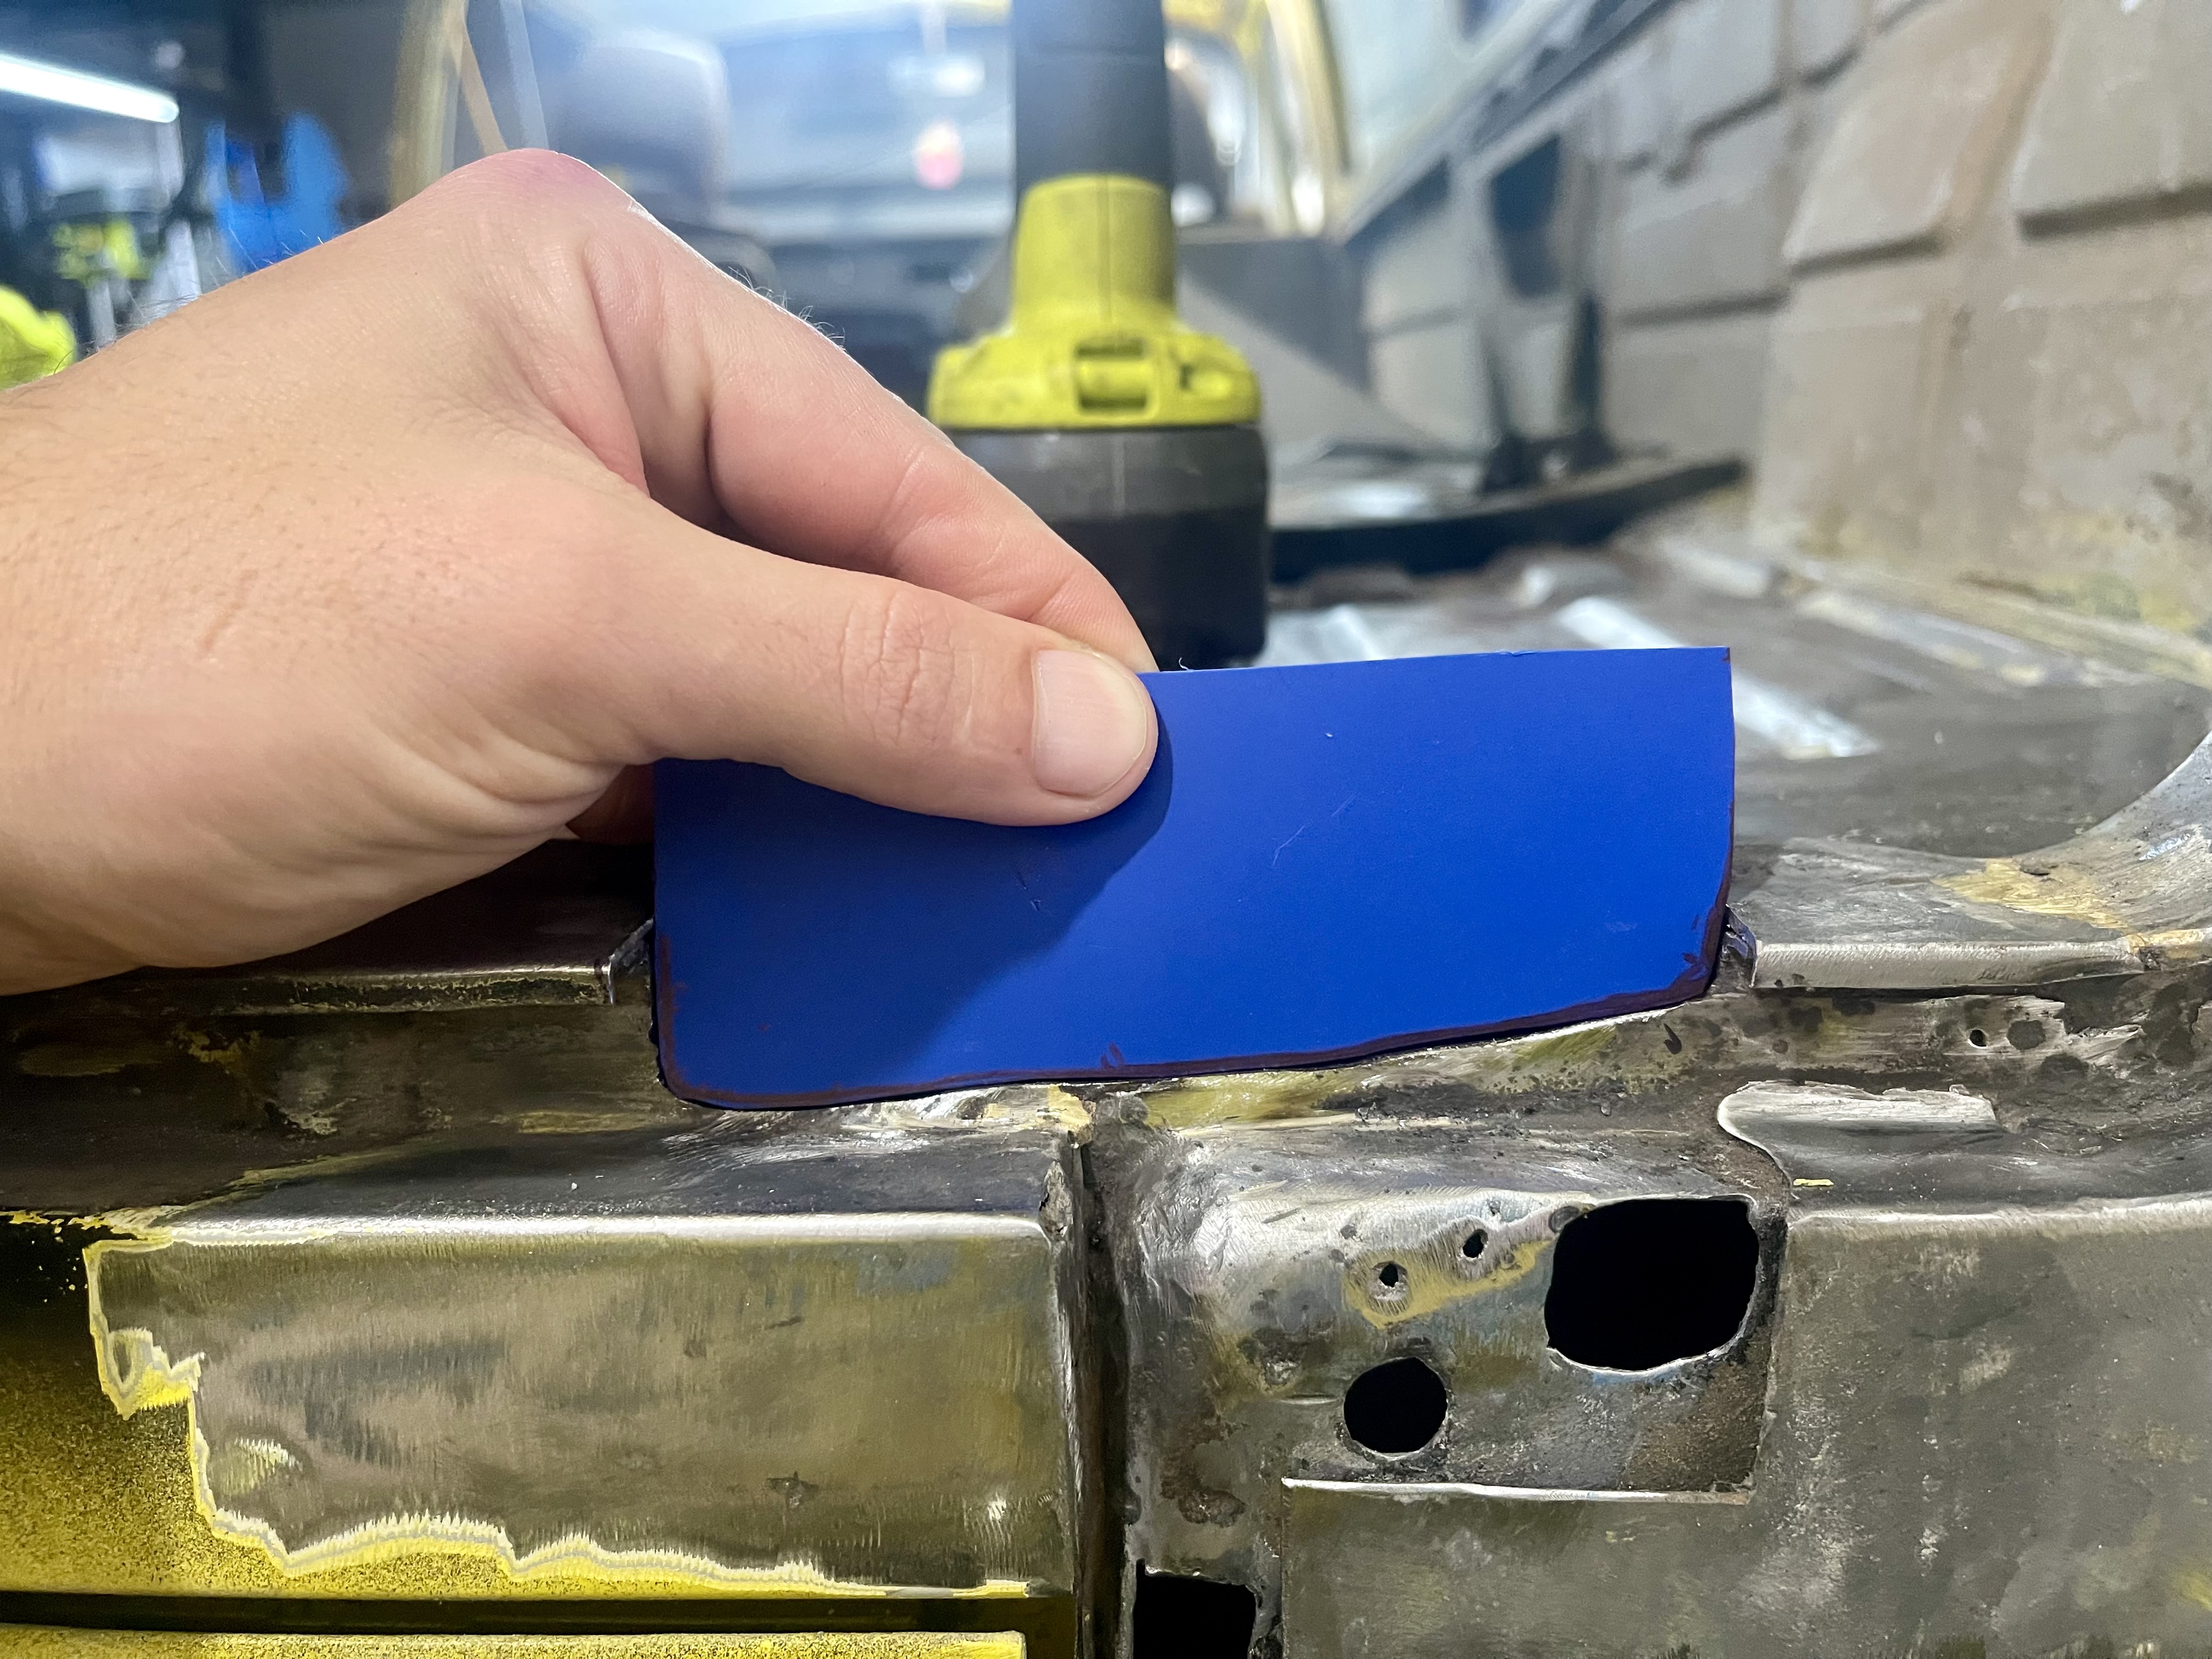 Creating a template for the replacement piece
Once I had all the damaged metal cut back to clean steel, I made some cardboard templates for the replacement pieces. Getting the shape right before cutting any sheet metal saves a lot of headaches. The D-pillar has some curves to it so I needed to be precise with the profiles.
 Sheet metal cut-out
 Folded, held in place with magnets, ready to weld
Cut the sheet metal to shape, folded the edges where needed, and held everything in place with welding magnets. Magnets are a lifesaver for this kind of work, they hold the panel tight against the existing metal so you can tack it without needing three hands.
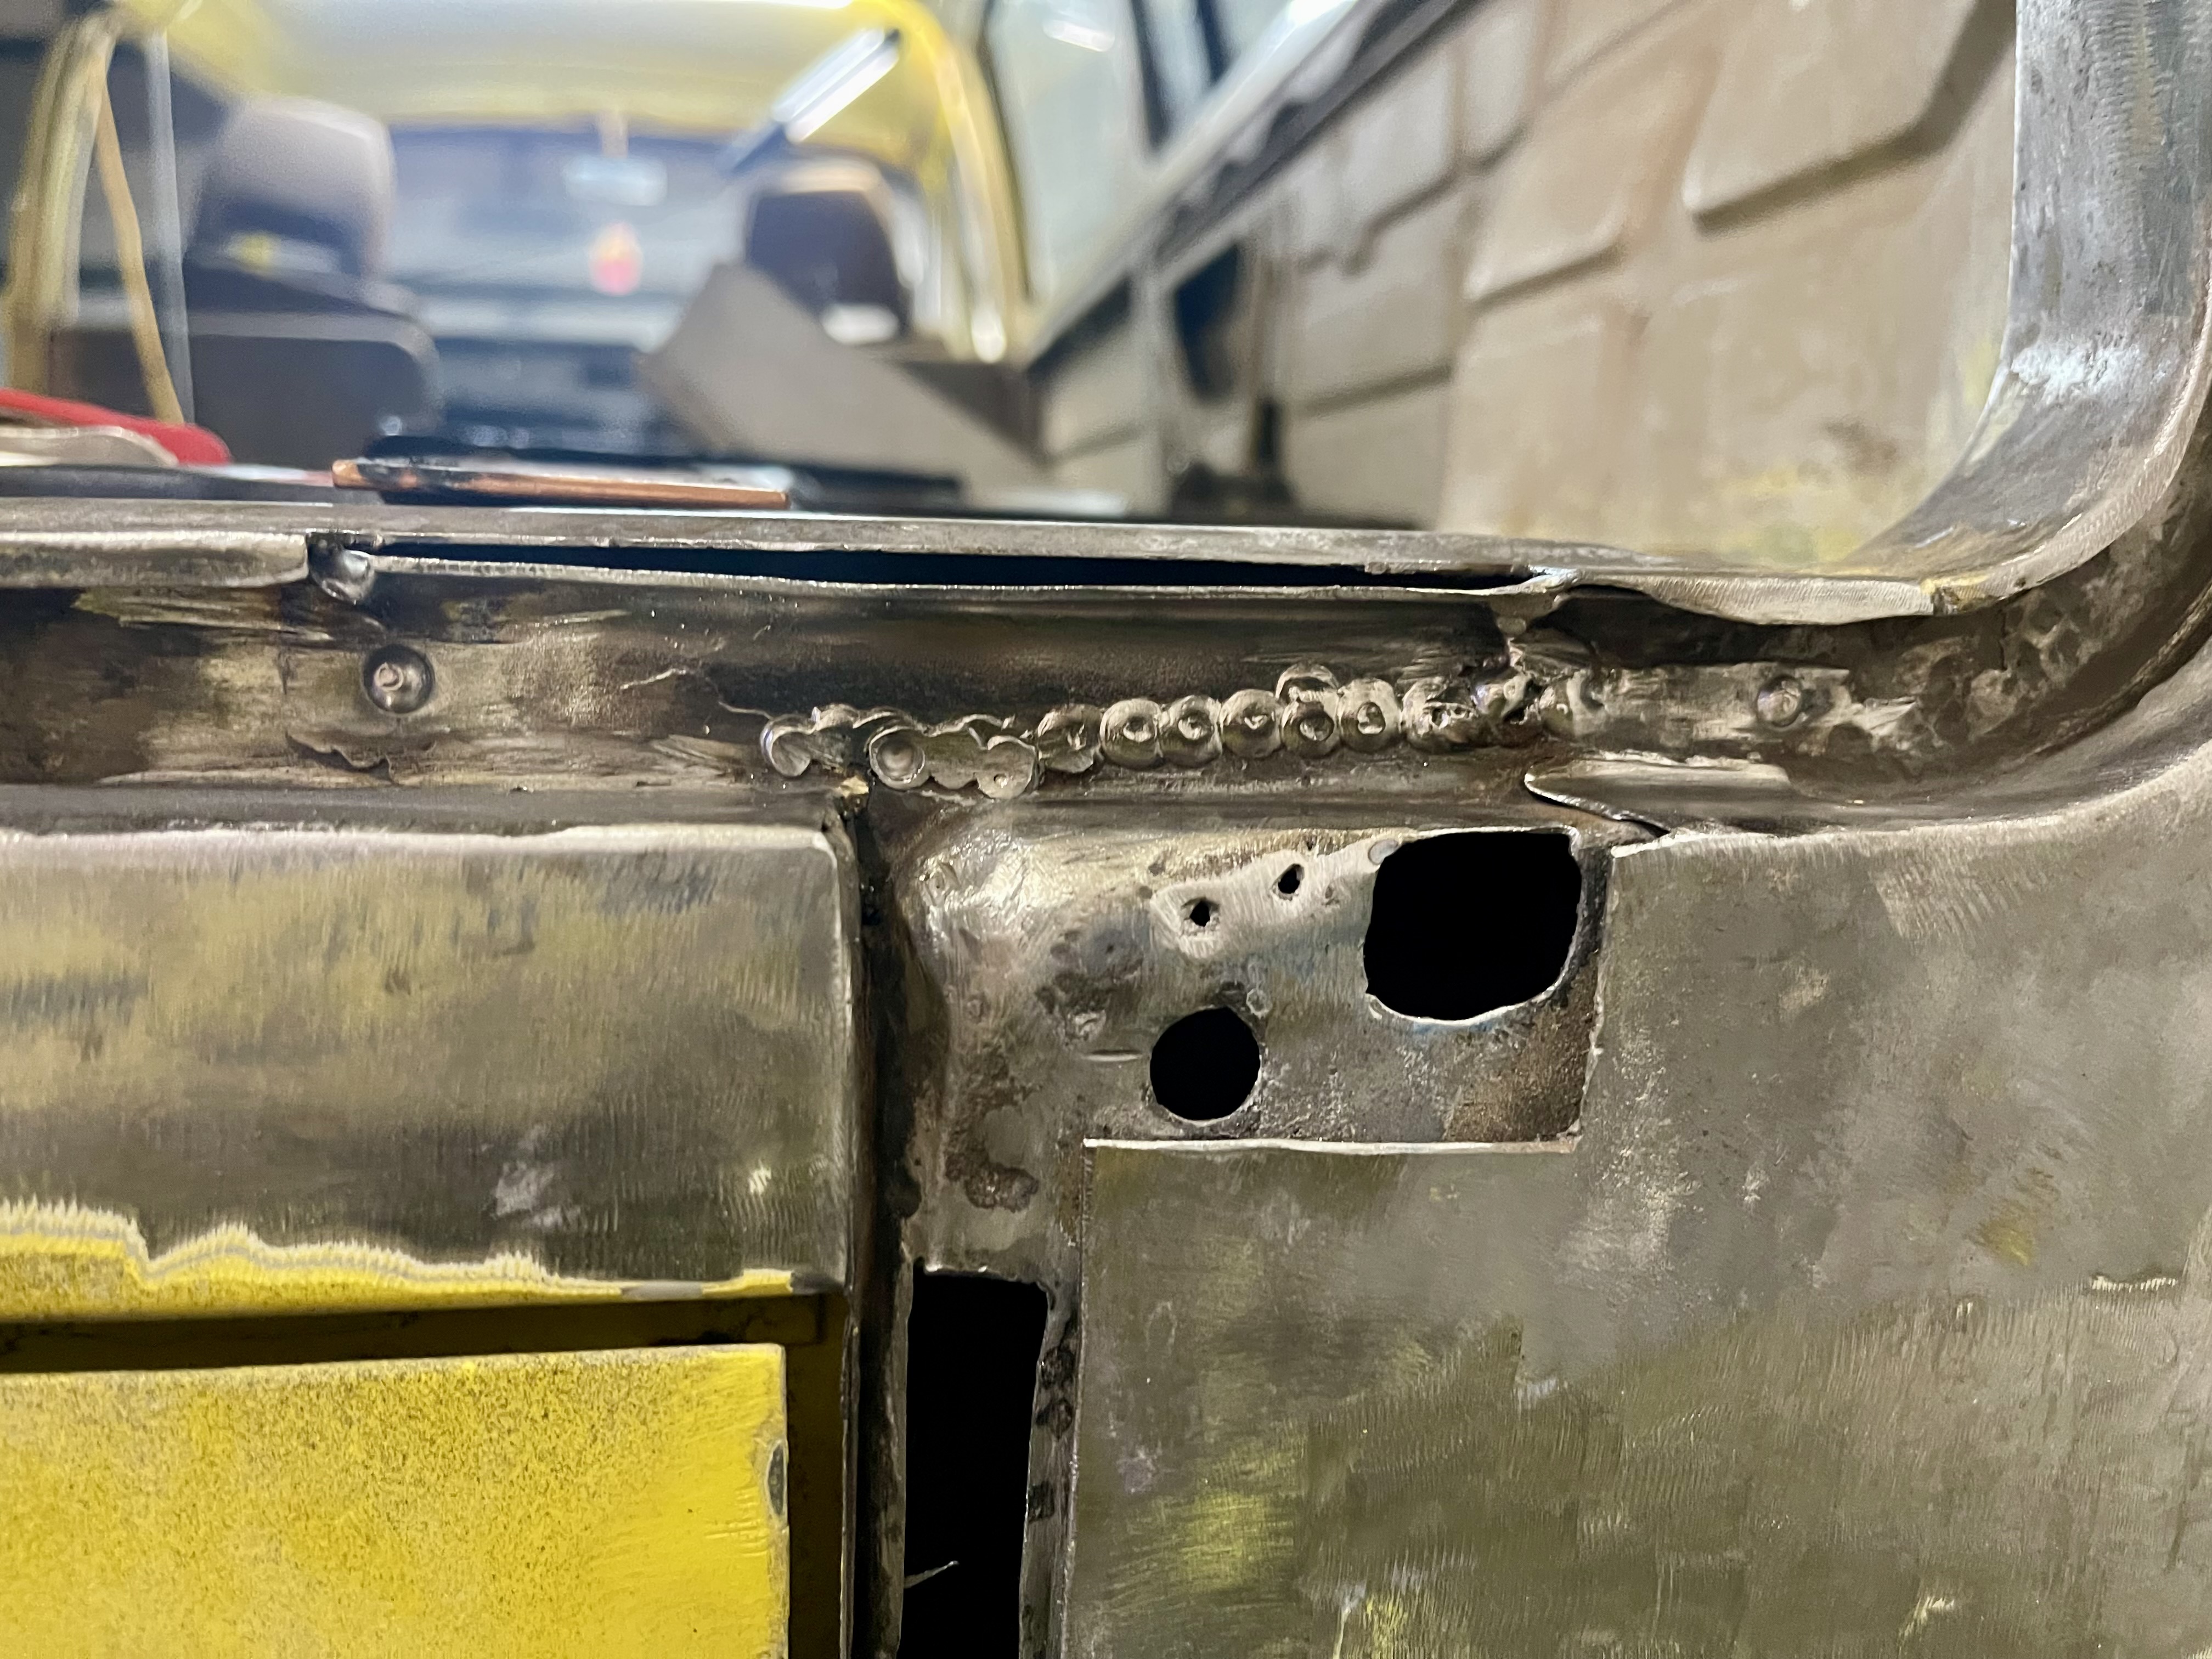 Stitch welded
 Post-grinding
Stitch welded the panels in to avoid warping the thin metal with too much heat. Short welds, let it cool, move to the next spot. Once it was all welded up, I ground the welds back smooth. It's satisfying watching a patch panel disappear into the body like it was always there.
 Another patch panel
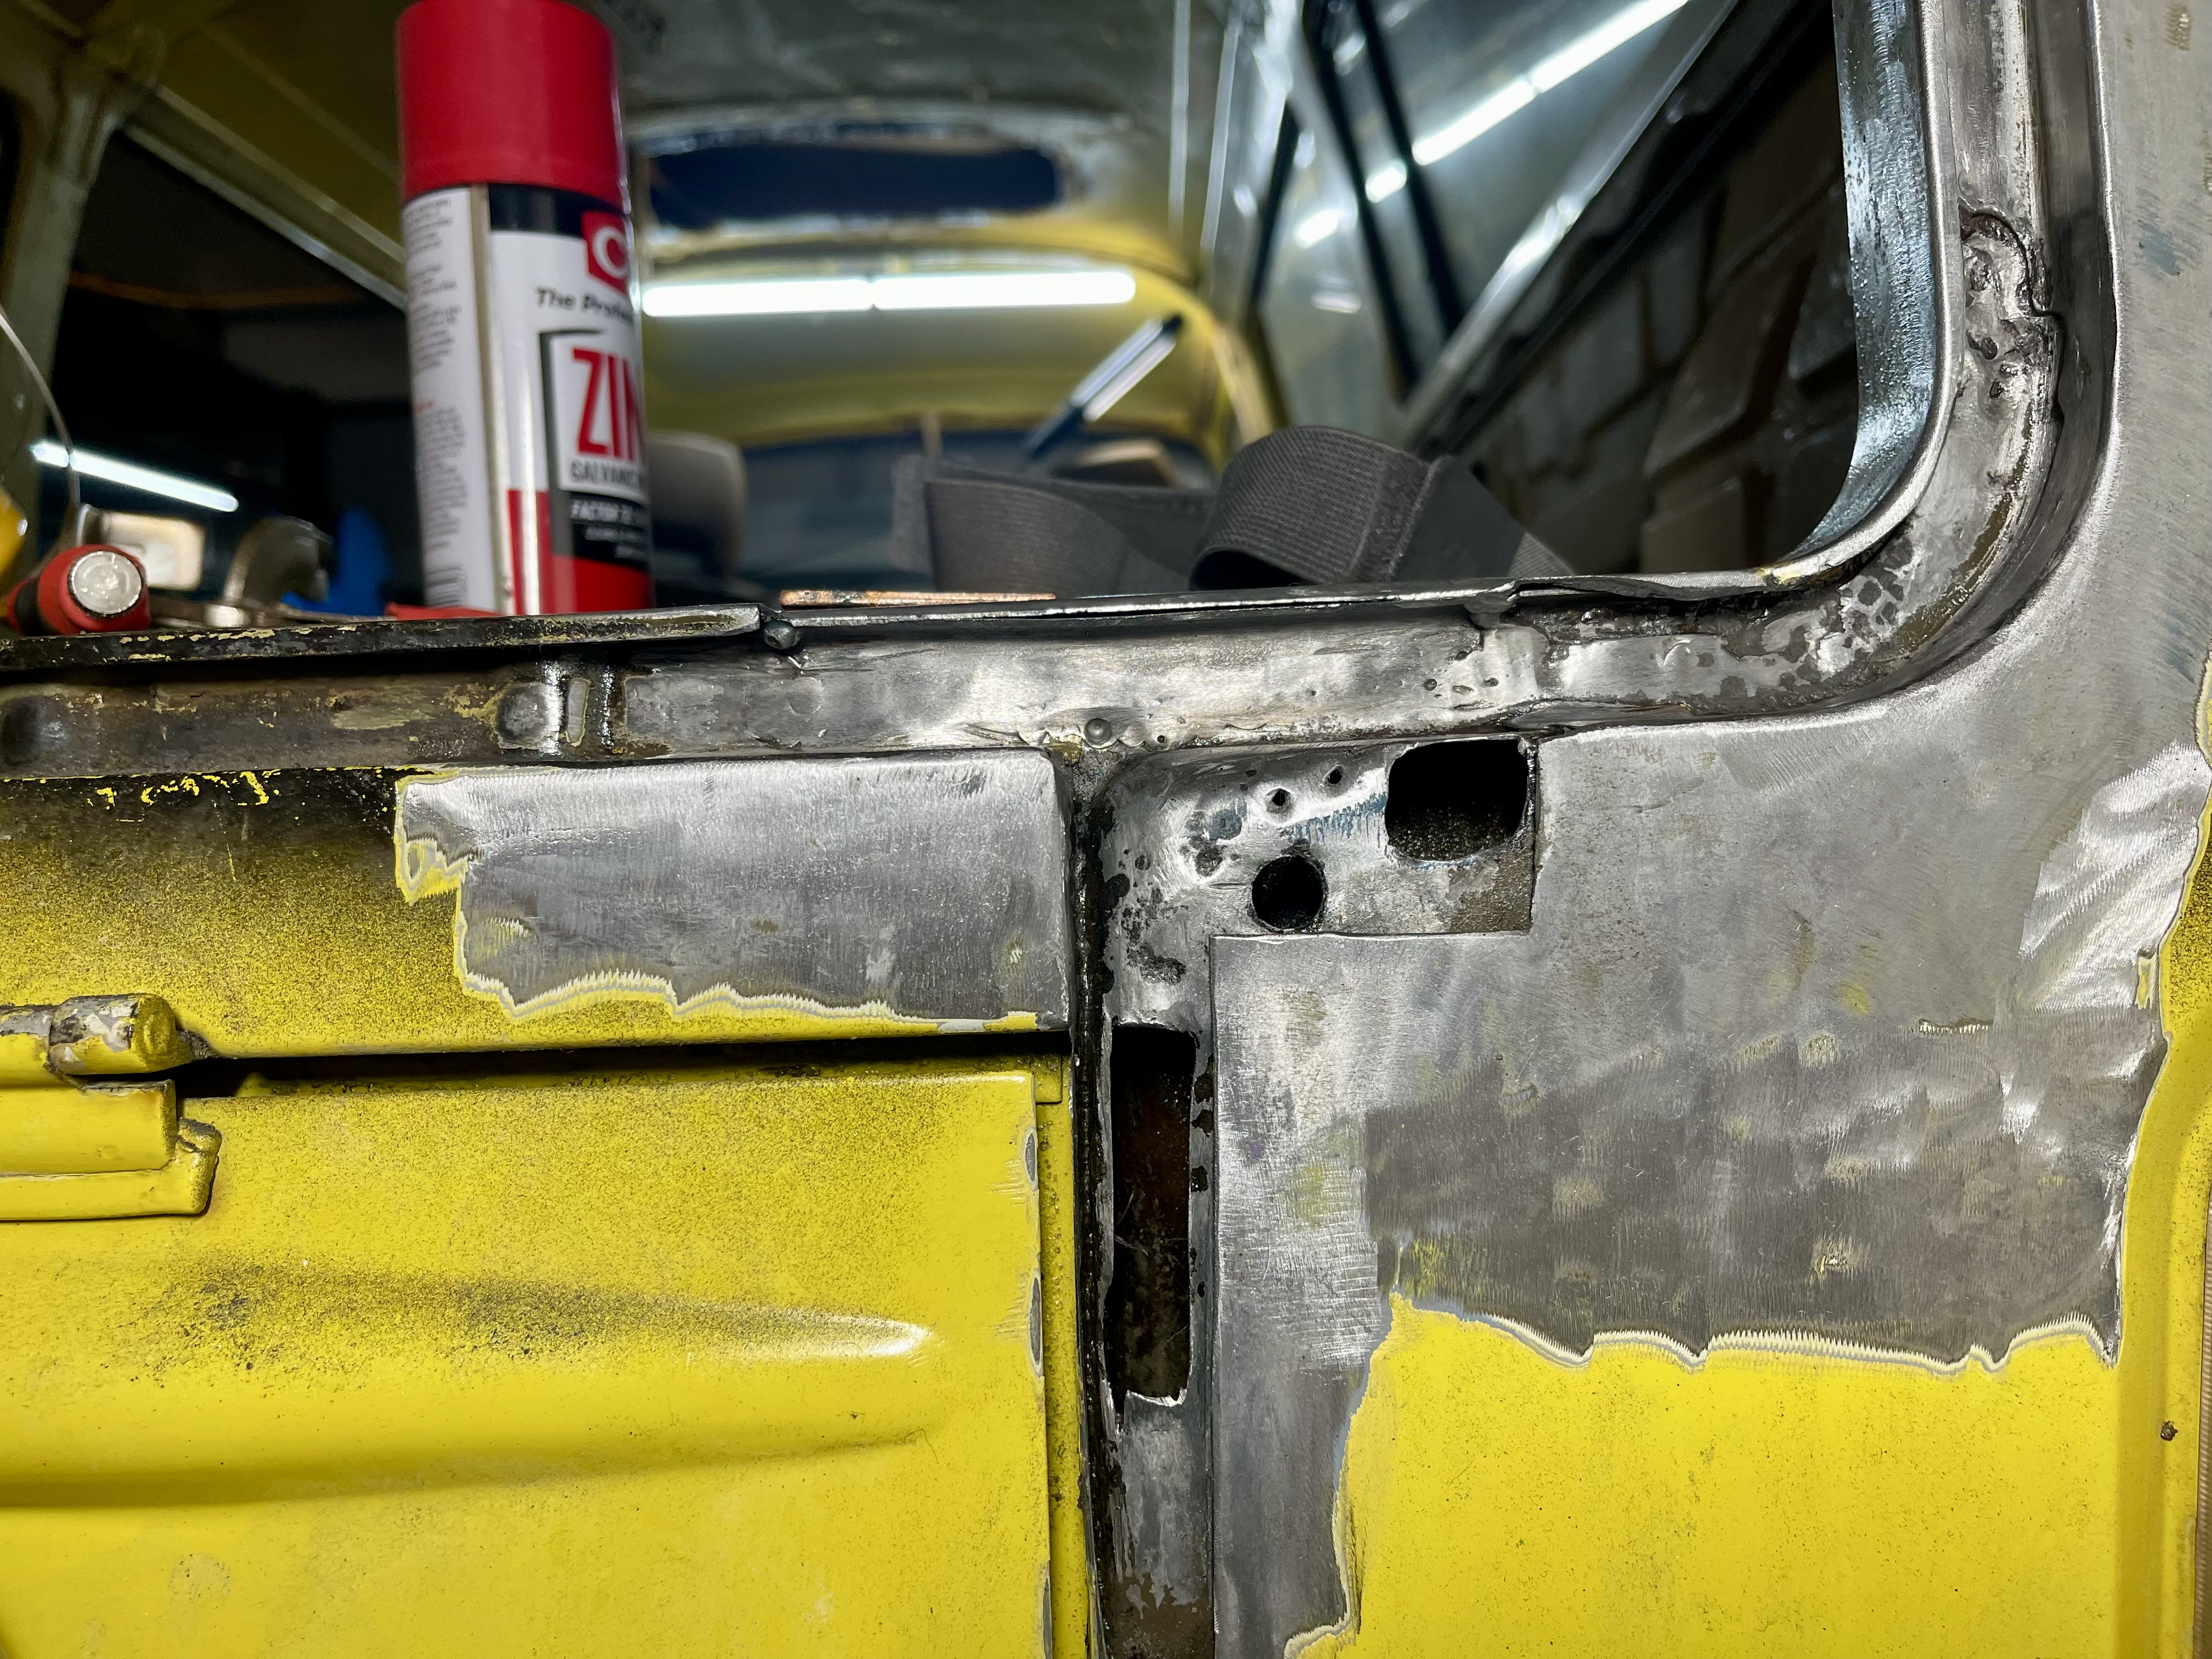
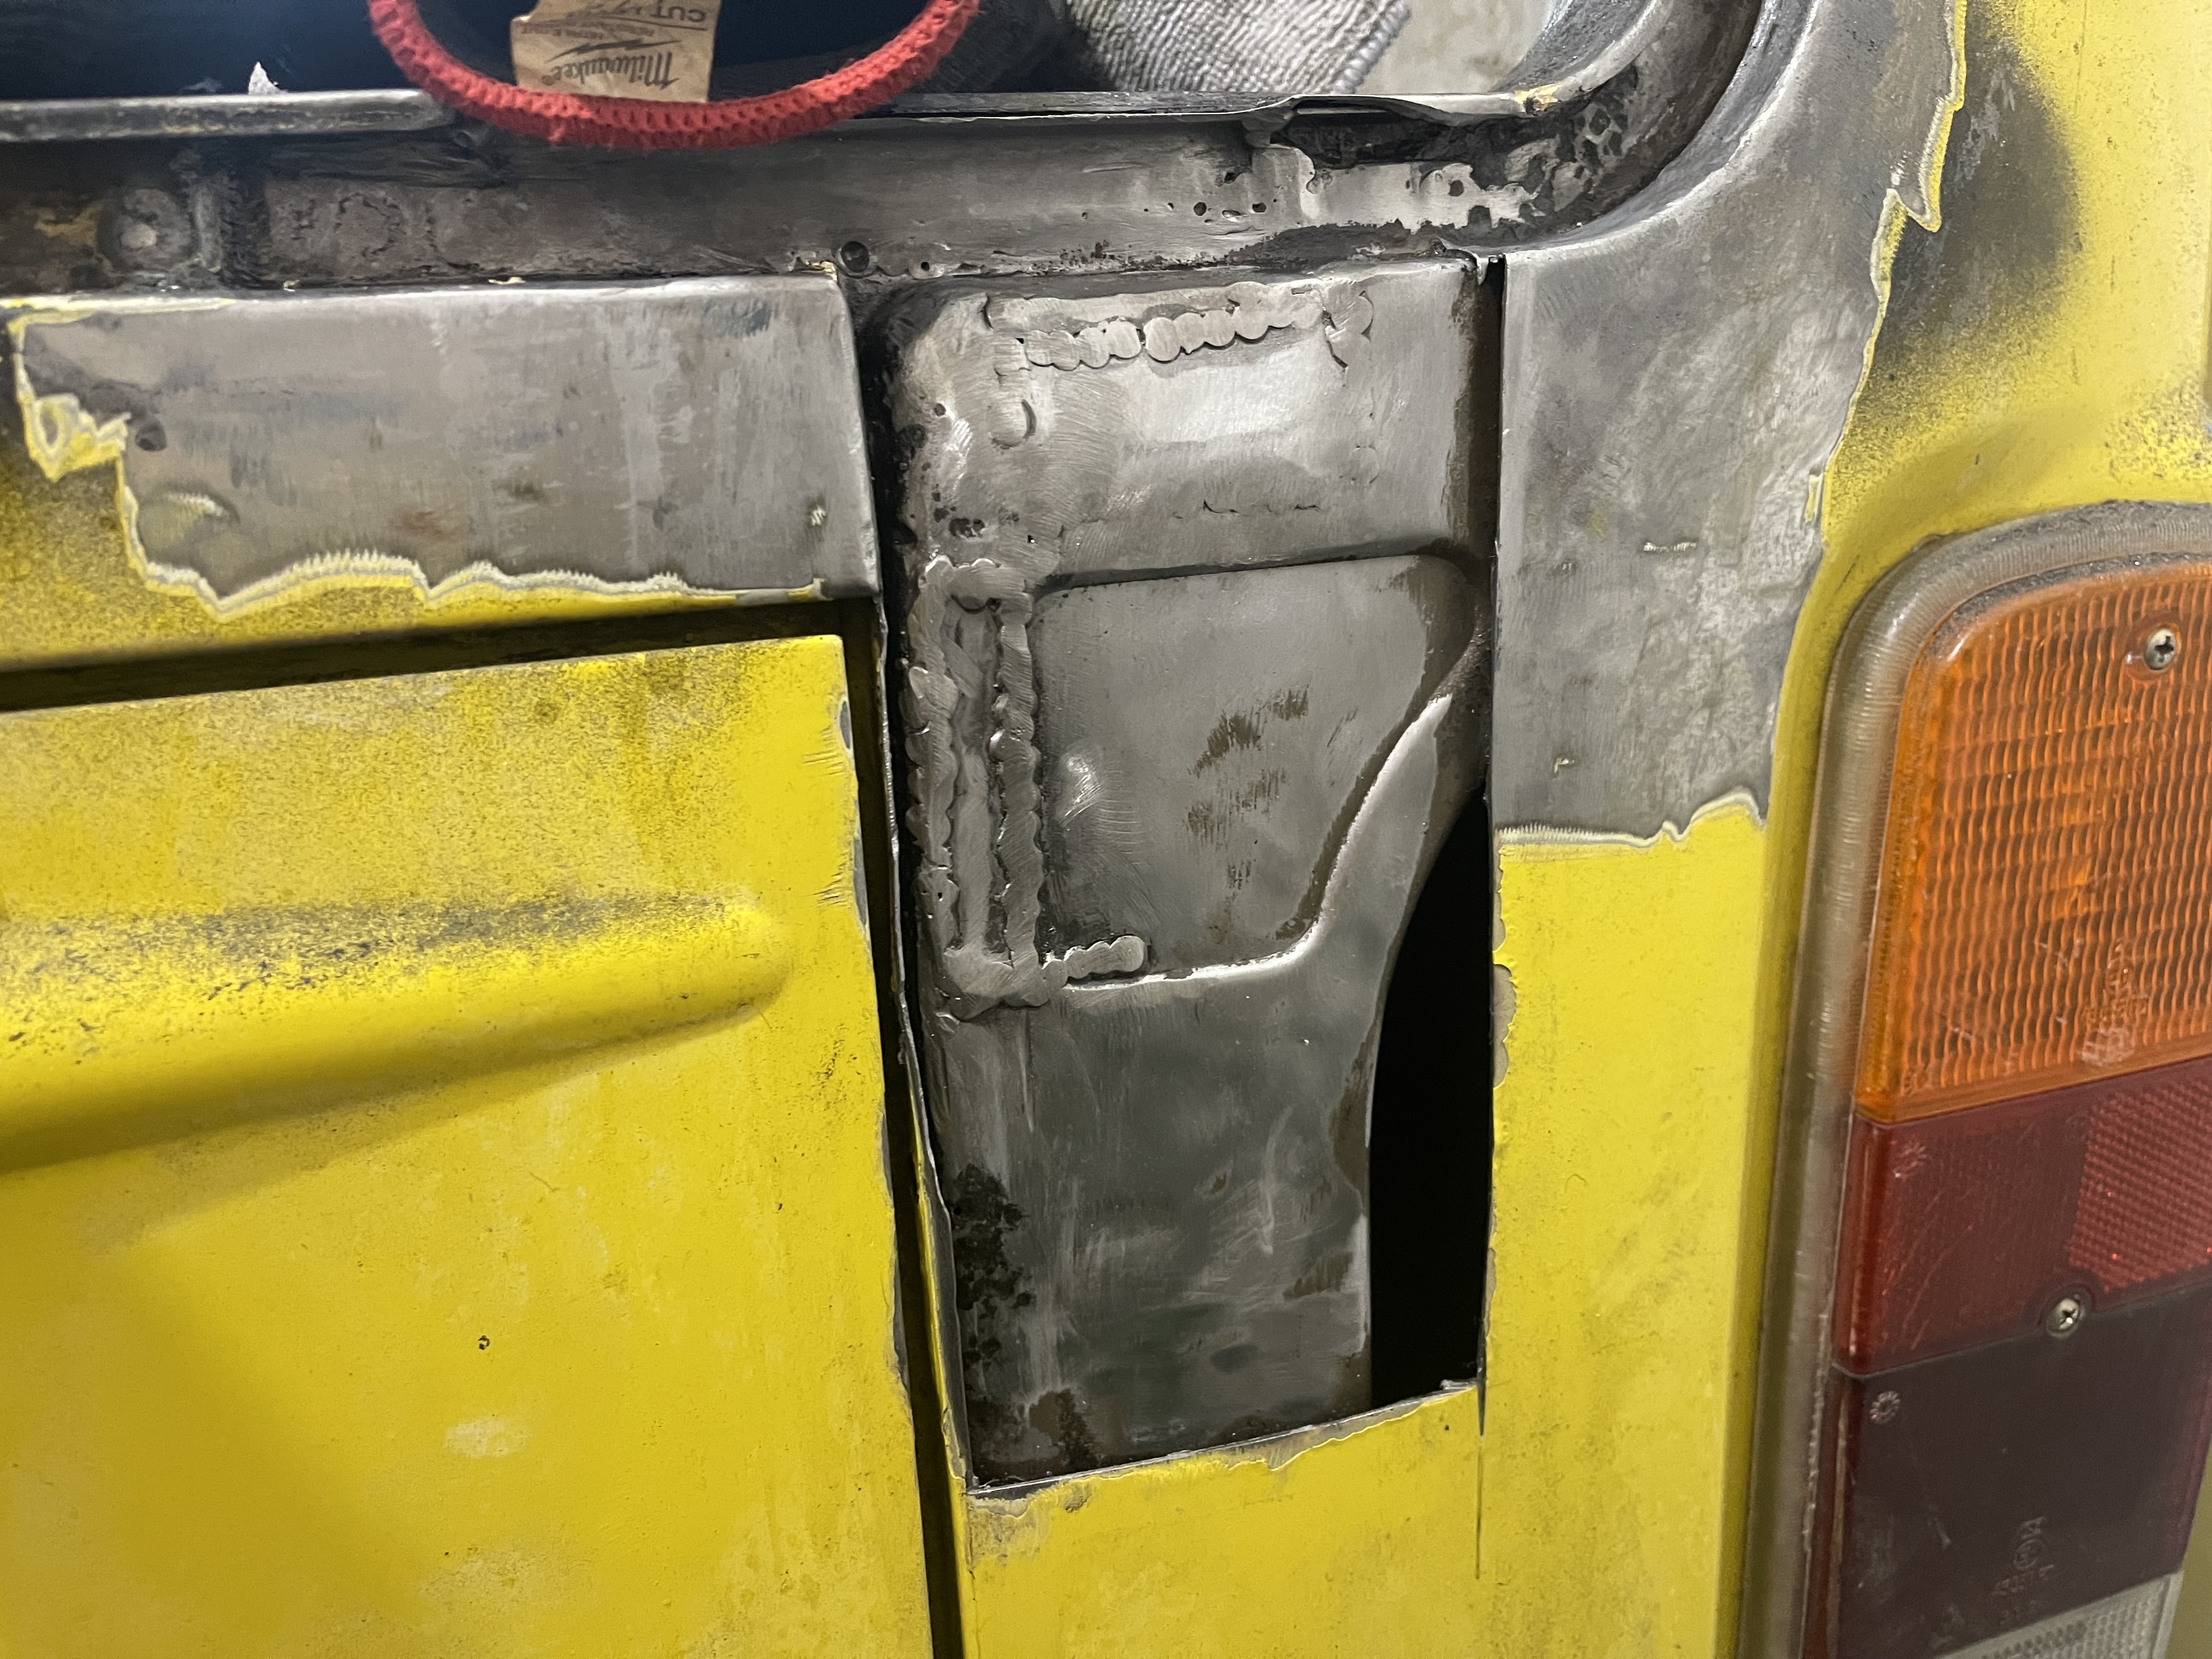 D-pillar and surround all patched up
A few more patches on the surround and the whole area is sorted. It's solid metal again instead of filler and rust. Still needs primer and paint, but the structural work is done. Every time I fix one of these hidden rust spots I feel like Daisy is getting stronger. Slowly but surely, she's coming back together.